Integrating with Plenom Busylight
The Plenom Busylight integration allows you to synchronize your status from MuteDeck to your Busylight, providing a visual indicator of your current meeting status. Please follow the instructions below to set up this integration successfully.
Prerequisites
Before proceeding with the integration, ensure that you have the following:
- MuteDeck installed and running on your computer.
- A Plenom Busylight connected and functional.
- For Windows users, the kuandoHUB application should be installed on your computer.
- For macOS users, the Busylight HTTP app should be installed on your computer.
Configuring Busylight
macOS
On macOS, the only thing you need to do is to install the Busylight HTTP app (linked in the Prerequisites), and you'll be ready to integrate MuteDeck.
Windows
On Windows, after you've installed the kuandoHUB app, you'll need to enable the HTTP Server.
- Open kuandoHUB and select the Advanced Settings on the left navigation.
- Click the HTTP Server checkbox to enable it.
- Open the Platform Priorities tab
- Enable the HTTP source, and use the Up buttons to place the HTTP source at the top of the list.
This allows MuteDeck to communicate with your Busylight.
Enabling the Integration in MuteDeck
Now that the Busylight is ready for the integration, you can enable the integration inside MuteDeck which will have it start sending updates to your Busylight.
- Open the MuteDeck window and click the settings icon on the bottom right to open the settings.
- Navigate to the Notifications tab, and enable the Enable Busylights switch.
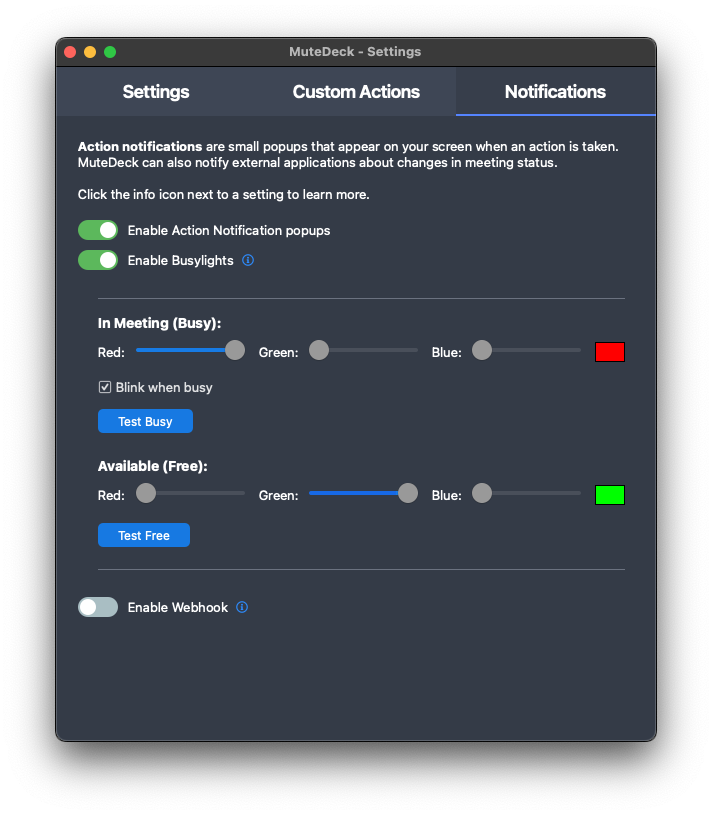
You have now successfully enabled the integration between MuteDeck and Plenom Busylights! By default, the Busylight turns off when you're not in a meeting, and turns red when you are in a meeting.
Customizing Your Busylight Colors and Behavior
Once you've enabled the Busylight integration, MuteDeck will show additional options that let you personalize how your Busylight behaves.
Colors
You can customize the colors for both meeting states using sliders:
In Meeting (Busy) Colors:
- Adjust the Red, Green, and Blue sliders (0-100 range) to create your perfect "busy" color
- A color preview box shows you exactly what your light will look like
- By default, this is set to bright red (Red: 100, Green: 0, Blue: 0)
Available (Free) Colors:
- Set custom colors for when you're not in a meeting
- Use the same Red, Green, and Blue sliders to find your ideal "available" color
- By default, this turns the light off completely (Red: 0, Green: 0, Blue: 0)
- Setting all colors to 0 will turn the light off entirely
Blinking the Light
For the busy state, you can enable the Blink when busy option to make your light blink instead of staying solid. This creates a more noticeable indication that you're in a meeting.
Testing Your Configuration
You can test how your Busylight will look:
- Click Test Busy to see how your light will appear during meetings
- Click Test Free to see how your light will appear when you're available
These test buttons let you preview your color choices and make adjustments before applying them to your actual meeting status.
Your Busylight settings are automatically saved as you make changes, so your personalized configuration will be remembered for all future meetings.