# Stream Deck Mute Channel Setup for Meetings
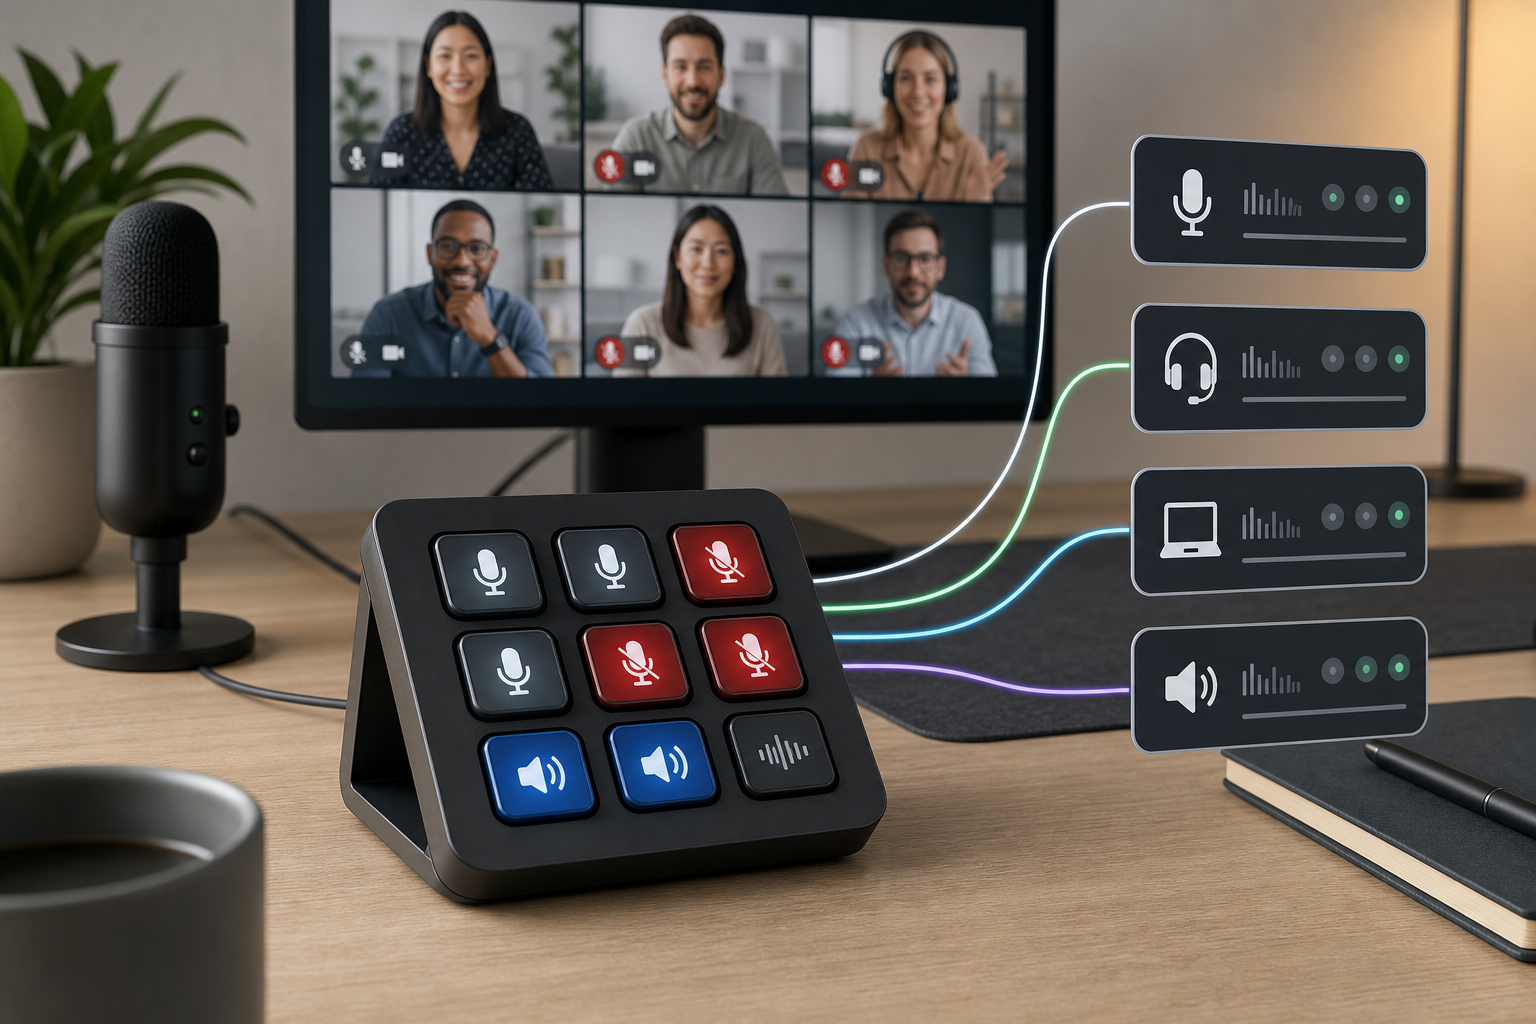
A Stream Deck mute channel setup should do one specific job: mute the microphone path your meeting app is actually using, then give you a visible way to confirm the result. The reliable version combines native meeting controls, a clear button layout, and a short pre-call test. That matters because a meeting can involve several audio layers: the app, the operating system, a browser permission, a headset, and sometimes a mixer or interface.
The safest approach is to treat Stream Deck as the control surface, not the only source of truth. Use it to make mute reachable while slides, notes, and demos have focus. Then confirm the final state in Zoom, Teams, Google Meet, or the audio device you trust most.
# What a Stream Deck mute channel needs to control
A mute channel is the audio path you want silent during a call. In a simple setup, that means the microphone selected in Zoom, Teams, or Google Meet. In a more complex desk setup, it may include a headset mic, USB microphone, virtual audio device, mixer channel, or browser input.
That distinction matters. A Stream Deck button can trigger a shortcut, plugin action, system command, or app-specific control. Those actions may affect different layers. If the button mutes your headset but Teams still shows you as unmuted, people may still hear another selected mic. If the button toggles Zoom but your screen share has keyboard focus, the shortcut may never reach Zoom.
Use this rule before building anything: decide which layer owns meeting mute.
For most meeting-heavy users, the meeting app should be the visible source of truth. The app knows whether other participants see you as muted. Hardware and mixer mute controls can still help, but they should support the meeting state instead of competing with it.
If you are still deciding whether you need a physical control surface at all, start with the broader mute button for PC meeting guide (opens new window). It covers native shortcuts, hardware buttons, and fallback paths before you commit desk space to another rectangle with opinions.
# Choose the right mute layer before assigning buttons
The best Stream Deck setup depends on the meeting risk and the audio stack. Use this table before mapping actions.
| Setup | Best primary mute layer | Stream Deck action | What to verify |
|---|---|---|---|
| Zoom or Teams calls with one USB mic | Meeting app mute | App shortcut or app action | The meeting mic icon changes |
| Browser-based Google Meet | Meeting app or browser shortcut | Meet shortcut, MuteDeck control, or browser-focused action | The tab and Meet mic state match |
| Presentations with slides full-screen | Dedicated meeting control layer | MuteDeck, app action, or global shortcut | It works while slides have focus |
| Headset used only for meetings | Headset mute plus app confirmation | Hardware mute if state is visible | Meeting app uses the headset mic |
| Mixer, GoXLR, or audio interface setup | Mixer channel plus meeting app check | Plugin or hotkey for the mic channel | The meeting app uses that same channel |
The table has one boring theme, which is often how reliable systems reveal themselves: the button and the selected microphone have to refer to the same thing. If they do not, the button may work perfectly while the meeting still hears you through another path.
# Build the Stream Deck mute button layout
Start with a small layout. A busy deck looks productive until you need one button during a sentence.
A practical meeting profile should include:
- Mute or unmute.
- Camera on or off.
- Screen share.
- Raise hand or reactions if your platform uses them often.
- Leave meeting or end meeting, placed away from the frequent controls.
- A fallback button that opens the meeting app or brings it to the front.
Put mute in a corner or on a button you can find without reading every label. Use clear icons and avoid tiny text. If your Stream Deck profile changes by app, keep mute in the same physical position across Zoom, Teams, and Google Meet. Muscle memory helps; surprise layouts are how people end calls with theatrical confidence.
Elgato describes Stream Deck as a customizable control surface for app actions and workflows on its Stream Deck product page (opens new window). That flexibility is useful for meetings, but it also means you have to design for failure. A meeting profile should be sparse, predictable, and easy to test.
For multi-app meeting days, MuteDeck can reduce profile sprawl by keeping common meeting controls in one place across supported meeting tools. Pair that with the app's own mute indicator, and you get a control layer plus visible confirmation. If you already use Stream Deck for meetings, the Stream Deck Google Meet guide (opens new window) shows the same principle in a browser-heavy workflow.
# Map Stream Deck actions to Zoom, Teams, and Meet
Native meeting shortcuts are usually the first action to test. Zoom maintains its hot keys and keyboard shortcuts (opens new window), and Microsoft documents keyboard shortcuts for Teams (opens new window). Google documents how to present during a Google Meet video meeting (opens new window), which is the exact moment many mute shortcuts get tested by window focus.
Shortcut actions are simple, but they can depend on focus. Test each one in the exact conditions you use during calls:
- Join a test meeting.
- Press the Stream Deck mute button with the meeting window active.
- Press it while notes are active.
- Press it while slides are full-screen.
- Press it while sharing a browser tab.
- Watch the meeting mic icon every time.
If the shortcut fails outside the meeting window, you need a different action type or a fallback control. That might be an app plugin, a global hotkey configured inside the meeting app, or MuteDeck as a meeting-control layer. The correct answer depends on the app and operating system, so verify the behavior instead of trusting the label on the button.
This is also where a meeting controls checklist (opens new window) pays for itself. A pre-call checklist catches focus, permissions, and selected-device problems while the audience is still safely imaginary.
# Handle mixer and GoXLR-style audio setups carefully
A mixer or audio interface adds useful control, especially for creators, trainers, and webinar hosts. It also adds another place for mute state to drift.
If your search started with a GoXLR plugin or a mute channel action, define the target channel first. The meeting app may use the physical mic, a processed virtual output, or a system default device. The Stream Deck button should mute the channel that feeds the meeting, not a channel that only affects your monitoring mix.
Use this checklist for mixer-style setups:
- Name the microphone device used by the meeting app.
- Identify the mixer or virtual channel that feeds that device.
- Mute that channel during a test call.
- Confirm the meeting app shows or detects silence.
- Unmute from the same button.
- Keep a manual meeting-app mute button nearby as a backup.
The backup matters because remote calls judge the final audio at the meeting app. A mixer can show mute while the meeting uses a different input. The reverse can happen too: the meeting says muted while your local monitor still hears the mic. That local noise is annoying, but the meeting state is the part other people experience.
For important calls, avoid changing audio routing right before the meeting. If you need a new plugin, profile, or virtual device, test it in a separate call and leave the production profile alone. Future you deserves a desk that does fewer experiments at 8:59.
# Troubleshoot a Stream Deck mute button that does nothing
When the mute button fails, move through the stack from visible meeting state to hardware.
- Check whether the meeting app is selected and responsive.
- Confirm the meeting app uses the expected microphone.
- Test the native keyboard shortcut without Stream Deck.
- Test the Stream Deck action while the meeting window has focus.
- Check browser microphone permission for Meet or web-based calls.
- Check operating system microphone permission.
- Check headset, mixer, webcam, or dock mute state.
- Rejoin the meeting only after the visible checks fail.
This sequence prevents random toggling. Random toggling feels active, but it creates several mute states and no evidence. The better habit is to change one layer, then confirm one indicator.
If the problem is broader than Stream Deck, use the laptop unmute troubleshooting guide (opens new window). It walks through the mute chain across meeting apps, permissions, and hardware controls.
# A simple profile for daily meetings
For daily meetings, keep the Stream Deck profile to six actions:
| Button | Purpose | Confirmation |
|---|---|---|
| Mute | Toggle meeting microphone | Meeting mic icon changes |
| Camera | Toggle camera | Self-view changes |
| Share | Start or stop screen share | Sharing banner appears or disappears |
| Participants | Open participant list | Panel opens |
| Chat | Open chat | Chat panel opens |
| Focus meeting app | Bring meeting window forward | Meeting window is visible |
This layout works because it matches the moments that interrupt calls. You need to speak, stop video, share, check a participant, answer chat, or recover focus. Anything else can live on a second page.
If you host webinars or training sessions, add role-specific controls after the basics work. For example, you might add record, spotlight, raise hand, captions, or scene controls. Add them one at a time and retest mute after each change. The mute button remains the anchor; the rest of the profile earns its place by reducing meeting friction.
# Final check before your next call
A Stream Deck mute channel setup works when the button, the selected microphone, and the meeting app state all agree. Build the profile around the meeting app first, then add hardware or mixer controls only when they serve that final state. Keep the layout small, keep mute in a consistent position, and test it while your real presentation tools have focus.
If you switch between Zoom, Teams, and Google Meet, MuteDeck gives you a meeting-control layer that can sit beside Stream Deck or your keyboard shortcuts. Use it to keep mute, camera, and screen share reachable, then let the meeting app confirm what the room can actually hear. That tiny pause before a call beats the louder kind of learning every time.
KEEP EXPLORING
More guides & tips