
# Logitech Camera Not Working? Here's How to Fix It
Nothing kills the momentum of a meeting faster than your webcam deciding to take an unscheduled break. One minute you're ready to go, the next you're staring at a black screen. But before you start spiraling down a rabbit hole of driver updates and software settings, take a breath. The fix is often surprisingly simple.
More often than not, the culprit is something physical. A loose cable, a forgotten privacy shutter, or a finicky USB port can all make it seem like your camera has given up for good.
# Your First Moves for a Working Logitech Camera
Think of this as a quick triage. We're going to rule out the most common, and easiest to fix, problems first. This is the stuff that gets overlooked in the pre-meeting scramble but solves the issue a good 90% of the time.
A big one I see all the time, especially with power-hungry cameras like the Logitech Brio, is plugging them into a low-power USB hub. These cameras need a direct line to your computer to get enough juice and bandwidth. A crowded hub or a weak connection just won't cut it. Practical tip: If your camera flickers or disconnects randomly, plugging it directly into a USB 3.0 port (usually blue) on your computer's motherboard often provides the stable power it needs.
# Immediate Troubleshooting Checklist
Before you go any further, run through this quick checklist. I've seen these simple actions bring countless "broken" webcams back to life in seconds.
| Check | What to Look For | Actionable Tip |
|---|---|---|
| USB Connection | Is the cable loose at either end (camera or computer)? | Unplug it, wait a few seconds, then plug it back in firmly. Listen for the "click." |
| Privacy Shutter | Is the lens physically covered? | Many Logitech models like the C920 have a built-in shutter. Slide it open. Example: Some shutters are just a small slider right above the lens—it's easy to bump it closed by accident. |
| USB Port | Is the port itself working? | Try a different USB port on your computer, preferably one directly on the motherboard (not a hub). Practical Tip: Test the original port with another device, like a mouse or keyboard, to confirm the port is still functional. |
These three checks are your first line of defense. They're quick, easy, and incredibly effective at solving the most frequent webcam headaches.
# Get the Basics Right: Connections and Privacy
Let's start with the most obvious stuff—because it's the easiest to miss.
- Secure the Cable: Don't just check if it's plugged in. Unplug the USB cable from your computer and the camera itself (if it's detachable). Give it a ten-second count, then plug everything back in, making sure it’s snug.
- Open the Shutter: It sounds silly, but you'd be surprised how often that little physical privacy shutter is the bad guy. Check your Logitech camera for a sliding cover or a clip-on cap and make sure the lens is clear.
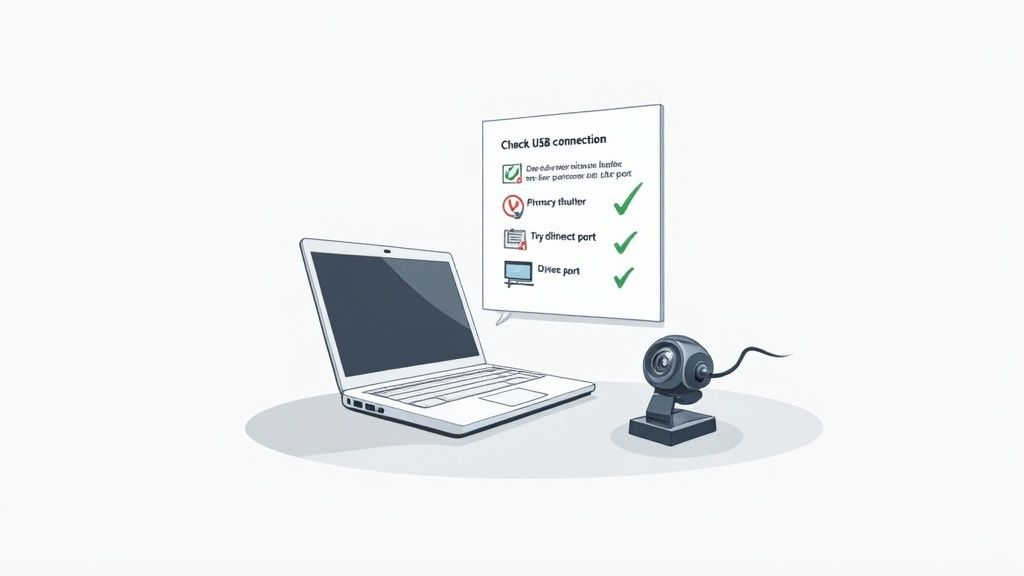
- Switch Up Your Port: Sometimes a single USB port just decides to stop cooperating. Plug your camera into a different one. If you're using a USB hub, unplug it and connect the camera directly to your computer. That alone solves a ton of issues.
This infographic breaks it down visually, helping you walk through the physical checks before you even think about software.

Follow that flow. It'll help you quickly isolate whether the problem is physical or if you need to dig a little deeper into your computer's settings.
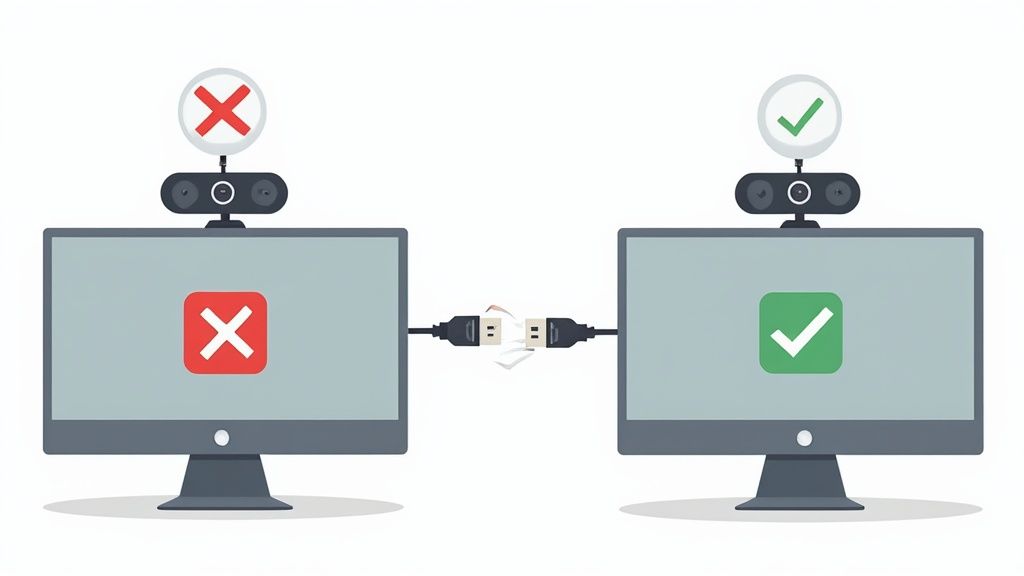
# Why a Solid Connection is Non-Negotiable
Before blaming your camera's software, you have to be sure the hardware foundation is solid. If your USB port is on the fritz, no device will work right. You can find some great advice on troubleshooting USB ports not working (opens new window) to rule that out completely.
A stable hardware connection is the bedrock of a reliable meeting setup. Without it, even the most advanced software can't compensate for an intermittent signal or insufficient power.
With hybrid work becoming the norm, the webcam market has exploded, but so have the technical glitches. User forums suggest that camera failures pop up in about 5-7% of devices, and a huge chunk of those are due to simple connection problems or software conflicts, not a broken camera.
And if you're managing multiple devices for your meetings, our guide on connecting various devices (opens new window) can help you create a more streamlined and reliable setup.
# Diving Into OS-Level Fixes on Windows and macOS
If a quick wiggle of the USB cable didn't bring your camera back to life, it's time to dig into the operating system. This is where things can get a little tricky. Both Windows and macOS have layers of settings, permissions, and drivers that can trip up your Logitech camera, even when the hardware is perfectly fine.
It happens all the time. You run a system update overnight, and the next morning, your trusty webcam is suddenly a paperweight. Given how many of us rely on Logitech devices, it's a frustratingly common scenario you'll see pop up in support forums.
# Taming the Windows Device Manager
For anyone on a Windows machine, the Device Manager is your first and best stop for hardware troubleshooting. Think of it as mission control for everything plugged into your PC.
To get there, just right-click the Start button and choose "Device Manager." You're looking for a category called "Cameras" or "Imaging devices." If your Logitech camera is sitting there with a little yellow exclamation mark next to it, you've found the problem.
That yellow icon is Windows screaming for help. It often shows up with an error like "Unknown USB device (Device Descriptor Request Failed)," which basically means the communication between your PC and the camera has completely broken down.
Right-click on the troubled device, and you'll get a few options. Here’s the order I usually try:
- Update driver: The simplest option. Let Windows search automatically for a new driver. Sometimes you get lucky.
- Disable device: This is like a soft reset. Try disabling it, waiting a few seconds, then re-enabling it. It can be surprisingly effective.
- Uninstall device: The heavy hitter. This completely removes the driver. Go ahead and uninstall it, unplug the camera, restart your computer, and then plug the camera back in. This forces Windows to start from scratch and find the right driver.
A classic scenario I've seen countless times is a Windows Update pushing a generic, one-size-fits-all driver that messes with the specific Logitech one. The "uninstall and reconnect" method almost always fixes this by forcing Windows to find the proper driver again.
# Checking Windows Camera Privacy Settings
Here’s another culprit that catches people out all the time in Windows 10 and 11: privacy settings. Your drivers can be perfect, but if Windows has locked down camera access, nothing will work.
Head over to Settings > Privacy & Security > Camera. You need to confirm two things are switched on:
- "Camera access" at the very top of the page.
- "Let apps access your camera" a little further down.
If either of those is off, you've found your issue. It's also worth scrolling down the list of apps to make sure the specific app you're using—like Teams or Zoom—has permission. If that individual toggle is off, the app will never see your camera. Practical tip: Some antivirus software can also block camera access. Check your security suite's settings for a "webcam protection" feature and ensure it isn't blocking your video apps.
# macOS Permissions and System Resets
On a Mac, when a Logitech camera isn't working, it's almost always a permissions issue. macOS is famously strict about what apps can access your hardware, which is great for security but can be a headache for troubleshooting.
Go to System Settings > Privacy & Security > Camera. You'll see a list of every app that's ever asked to use your camera. Find the app you're trying to use (Zoom, Google Chrome, etc.) and make sure its toggle is switched on. If it's off, all you'll get is a black screen.
If an app isn't showing up in that list at all, you might be dealing with a deeper problem. We have another guide that covers what to do when an app is not detecting your hardware (opens new window).
For those on an older, Intel-based Mac, there's a secret weapon: an SMC (System Management Controller) reset. The SMC handles low-level hardware functions, including recognizing what's plugged into your USB ports. If your Mac just isn't seeing the camera, an SMC reset can often jolt it back to its senses. The key combination is different for each model, so be sure to look up the correct one for your MacBook or iMac.
Finally, if you're certain a recent software update broke things, you can always roll back to a previous state. This is a bit of a last resort, but it can be incredibly effective. For Windows users, learning about using System Restore in Windows (opens new window) can be a real lifesaver.
# Fixing Camera Conflicts Within Your Apps
Sometimes, the problem isn't with your Logitech camera or your operating system. The real culprit is often the very app you're trying to use—Zoom (opens new window), Microsoft Teams (opens new window), or Google Meet (opens new window). These apps can be surprisingly possessive of hardware, leading to that frustrating moment where your camera works one minute and vanishes the next.
A classic real-world scenario is having one application "lock" the camera, preventing others from accessing it. Imagine you just wrapped up a quick call on Skype (opens new window) but didn't fully close the application. Now, when you launch Zoom for your next big meeting, it insists "No camera found" because Skype is still hogging the video feed in the background.
This digital tug-of-war is one of the most common reasons a perfectly functional Logitech camera appears to be broken. The key is to find and shut down the offending program.
# Hunting Down Camera-Hogging Apps
Your first move should be to play detective and find any hidden applications that might be monopolizing your webcam. Both Windows and macOS have built-in tools perfect for this job.
On Windows, your go-to is the Task Manager.
- Press Ctrl + Shift + Esc to open it directly.
- Scan the "Apps" and "Background processes" lists for any other communication software.
- Look for apps like Skype, Discord, or Webex that might be lingering. Even browser tabs from a previous call can be the problem.
- Once you spot a suspect, select it and click "End task."
On macOS, you'll use the Activity Monitor.
- Find it in Applications > Utilities or just search with Spotlight.
- In the CPU tab, look through the "Process Name" column for the same types of apps.
- Select the process you want to close and click the "X" button at the top of the window.
Nine times out of ten, closing these background apps resolves the "Logitech camera not working" issue instantly. After you've ended the task, relaunch the app you actually want to use and see if your camera pops back to life.
# Navigating In-App Video Settings
Even if no other app is blocking your camera, you still need to make sure the program you're using is looking at the right device. Most video conferencing tools are smart, but sometimes they default to the wrong source, like a virtual camera or your laptop's built-in webcam.
Diving into the settings is crucial. It's a quick check that can save you a ton of frustration.
This table gives you a quick reference for finding the camera settings in the most popular meeting tools.
| Application | Settings Location | Key Action |
|---|---|---|
| Zoom | Gear icon → Settings → Video | Use the "Camera" dropdown to select your Logitech webcam. |
| Microsoft Teams | Three dots (...) → Settings → Devices | Under "Camera," pick your Logitech device from the list. |
| Google Meet | Three-dot menu → Settings → Video | Ensure your Logitech camera is the selected video source. |
Making the correct selection here tells the application exactly which video feed to use, bypassing any confusion. If your Logitech camera is listed but still won't turn on, that's a good sign the problem might be a driver or OS-level issue instead. MuteDeck also provides an excellent list of supported apps and their specific behaviors (opens new window), which can help you understand how different platforms interact with your hardware.
A common tripwire for web-based tools is browser permissions. You can have everything set up perfectly in Google Meet, but if you haven't given Chrome permission to access your camera, you'll just be staring at a black screen.
To fix this, look for the small lock icon in your browser's address bar. Click it, go to "Site settings," and make sure "Camera" is set to Allow. This simple, often-overlooked step is a critical piece of the puzzle.
# Navigating Logitech Drivers and Software
So you’ve checked the cables and confirmed the OS sees your camera, but it’s still not working. When this happens, the problem often lives in the software that tells your camera how to behave. Think outdated drivers, corrupted files, or even having the wrong Logitech app installed—all common culprits that can cause some seriously frustrating glitches.
This is where a little software know-how becomes your best troubleshooting tool.

A lot of people get bogged down trying to hunt for the "right" driver to download, but modern operating systems are pretty good at handling that part automatically. Instead, your focus should be on the official Logitech software that manages your device’s firmware and advanced settings. Firmware updates, in particular, are gold—they often contain specific fixes for things like video flickering or detection failures.
# Which Logitech Software Do You Need?
Logitech has a few different apps, and grabbing the right one is crucial. Installing the wrong software won't just fail to help; it can add another layer of conflict.
- Logi Tune: This is the one you want for most modern professional webcams, like the popular Brio and C920 series. It’s built for managing settings like zoom and color, and most importantly, handling firmware updates.
- Logitech G HUB: This is for Logitech's gaming gear. If you have a G-series webcam (like some StreamCam models aimed at gamers), G HUB is your tool. It handles lighting, special effects, and other gaming-focused features.
Trying to use G HUB for a business webcam like a Brio 500 will likely end with the app not even recognizing your device. Stick to the software designed for your specific model. Practical tip: If you're unsure which software to use, just Google your camera's model name (e.g., "Logitech C922 software") and the first result should be the official Logitech downloads page for that device.
# Checking for Critical Firmware Updates
Before you tear your hair out, just check the firmware. A firmware update is like a mini-OS for your camera, and Logitech pushes them out regularly to fix bugs that crop up after launch.
Here’s a pro tip: open Logi Tune, select your camera, and find the "About" or "Device Information" section. It will show you the exact firmware version you're running. If the app says an update is available, install it right away. If not, you’ve just saved yourself a ton of time and can move on.
Think of firmware as the bridge between your camera's hardware and your computer's software. When a new OS update is released or a widespread bug is found, a firmware patch is often Logitech's way of rebuilding that bridge to ensure everything communicates correctly.
# Performing a Clean Software Reinstallation
If a firmware update doesn't do the trick or the Logitech software itself is acting up, it’s time for a clean reinstall. Simply installing the new version over the old one might not cut it; you need to get rid of the old files completely.
This process ensures any corrupted settings are wiped clean, giving you a totally fresh start.
- Uninstall the Software: On Windows, head to Apps & features, find Logi Tune or G HUB, and uninstall it. On macOS, just drag the app from your Applications folder to the Trash.
- Delete Leftover Folders: This is the step most people miss, and it's critical. On Windows, look for Logitech-related folders in
C:\Users\[YourUsername]\AppData. On a Mac, check~/Library/Application Supportand delete them. - Restart Your Computer: A quick reboot clears out any processes still hanging around in memory.
- Reinstall the Latest Version: Go straight to the Logitech support website (opens new window), find your camera model, and download the newest version of the correct software.
This clean-slate approach is incredibly effective for fixing persistent issues that a simple update can’t solve. It’s a bit more thorough, but it often gets to the root cause of those pesky "Logitech camera not working" errors that stem from software corruption.
# When It’s Time to Suspect the Hardware
You’ve wrestled with drivers, tweaked every software setting, and confirmed your privacy permissions a dozen times. Yet, your Logitech camera still refuses to cooperate. At this point, it’s time to shift your thinking. The problem might not be in your computer’s brain, but in the camera’s body.
We’re now at the final stage of troubleshooting, where we ask one simple question: is the webcam itself broken?
Before you declare it dead, remember that the accessories between the camera and your computer are often the real culprits. I've lost count of how many "broken" cameras were just victims of a faulty USB hub, a worn-out extension cable, or a dock that couldn't provide enough power.
# The Ultimate Hardware Test
There’s one surefire way to know if your webcam has a hardware fault: plug it into a completely different computer. This is the single most important diagnostic step you can take.
Grab a friend's laptop or a spare machine. If the second computer also can't see the camera or throws the same errors, you can be 99% certain the camera is the problem. But if it springs to life on the new machine? The issue is back on your original computer—either with its hardware or a really stubborn OS-level glitch.
This simple test is all about isolating the variable. Take your computer out of the equation, and you'll know instantly whether to keep digging into software or start shopping for a replacement.
# Stripping It Back to Basics
Can't get your hands on another computer right now? No problem. You can still do a lot by simplifying the connection.
- Ditch the Middlemen: Unplug your webcam from any USB hubs, docking stations, or extension cables. Connect it directly to a primary USB port—ideally one on the back of your desktop's motherboard or straight into the side of your laptop. These ports offer the cleanest, most stable connection.
- Inspect the Lifeline: Give the camera's USB cable a thorough once-over. Look for any obvious frays, sharp kinks, or bent pins on the connector. A damaged cable is a classic, and often overlooked, point of failure. Practical tip: Gently wiggle the cable near both connection points while the camera is plugged in. If the camera flickers on and off, you've found a bad cable.
- Check the Camera-Side Connection: If your webcam has a detachable cable (like many newer Logitech models), unplug it from the camera itself. Wait a few seconds, then plug it back in, making sure it clicks in securely. It's surprisingly easy for this connection to get loose.
# Deeper Dives for the Tech-Savvy
If you're comfortable poking around under the hood, there are a couple more advanced checks you can run. The first involves a trip to your computer's BIOS or UEFI settings.
To get there, you'll need to restart your computer and press a specific key during boot-up (usually F2, F10, or Del). Once you're in, navigate to the USB configuration options. Your goal is to make sure all USB ports are enabled and that no aggressive power-saving modes are shutting them down. It's a long shot, but for a port that seems totally dead, this can be the culprit.
It's also worth noting that security software can be overzealous. In corporate IT, it’s not uncommon to see conflicts where security tools block camera drivers. Some IT departments even report that roughly 10% of their video conferencing support tickets trace back to this kind of issue. You can find more insights on the broader webcam market over at FutureDataStats.com (opens new window).
# Getting Ready to Contact Logitech Support
If all signs point to a hardware failure, your next stop is Logitech support for a potential warranty claim. To make that call as quick and painless as possible, get your ducks in a row first.
- Know Your Gear: Have the full model name and the serial number handy. You can usually find this on a small sticker on the camera or its cable.
- Find Your Receipt: Locate your proof of purchase, whether it's a digital receipt or an order confirmation.
- List Your Steps: Briefly tell them what you've already tried, especially mentioning that you tested it on another computer. This shows you've done your homework and helps the support agent skip the basic script and get right to the solution. Example: "Hi, my C920 isn't working. I've confirmed the privacy settings are correct, reinstalled Logi Tune, and tested it on my work laptop where it also failed to connect. My serial number is..."
# Common Questions About Logitech Cameras
Even after running through all the checks, you might still be staring at a blank screen or a stubborn error message. That's completely normal—webcam problems can feel weirdly specific to your own setup. Here are some of the most common head-scratchers we see when a Logitech camera isn't cooperating.
Let's dig into everything from app-specific quirks to that dreaded black screen and find the last piece of the puzzle.
# Why Does My Logitech Camera Work in One App but Not Another?
This is a classic case of a software conflict or a permissions mix-up. It usually happens when one app "hogs" the camera and won't let it go, making it invisible to other programs.
The first thing to do is shut down everything that could possibly be using the camera. I'm talking about Zoom, Teams, Discord, Skype, and even that forgotten browser tab from a video call you had yesterday. Practical tip: On Windows, check the system tray (the area by the clock) for icons of running communication apps. Right-click and quit them from there to ensure they fully close.
If that doesn't work, head straight to your OS settings to check permissions. On a Mac, it's under Privacy & Security. On Windows, search for Camera privacy settings. Make sure the app you're trying to use has explicit permission to access the camera.
Finally, open the app itself and dive into its video settings. You might discover it has defaulted to a virtual camera or another connected device instead of your Logitech webcam.
# My Logitech Camera Light Is On, but the Screen Is Black. What Now?
Seeing the little LED light on with a black screen is a weirdly common issue. It means the camera is getting power and your computer sees it, but the video data isn't making it to your screen.
Before you do anything else, check for a physical privacy shutter on the lens. It sounds obvious, but it’s the number one reason this happens. We've all done it.
If there's no shutter, it’s almost certainly a driver or software conflict. Here’s what to try:
- Unplug the camera, wait a few seconds, and plug it back in. This simple "reboot" often resets the connection.
- Update your graphics card drivers. Outdated GPU drivers can sometimes interfere with how video is rendered on your screen.
- Do a clean reinstallation of the Logitech software, whether you use Logi Tune or G HUB.
One last thing to check is your antivirus or security software. Some aggressive security suites have features that block webcam feeds to prevent spying, and you may need to add your meeting app to its "allow" list.
A black screen with the light on is a telltale sign of a software bottleneck. The hardware is powered and recognized, but something—whether it's a driver, an app, or a security setting—is stopping the video data from reaching your screen.
# How Do I Know if My Logitech Webcam Is Actually Broken?
There's one dead-simple test to figure this out: plug the webcam into a different computer.
If you connect it to another laptop or desktop and it still doesn't work (even after the new machine installs the basic drivers), then the hardware is almost certainly faulty. It's time to contact Logitech support or look for a replacement.
But if it works perfectly on the second computer? The problem is 100% on your original machine—something to do with the software, drivers, or OS settings. This single test can save you hours of wasted time troubleshooting software when the hardware is the real issue.
# Can I Use My Logitech Camera Without the Official Software?
Yes, you absolutely can. Modern operating systems like Windows and macOS have built-in UVC (USB Video Class) drivers that let most Logitech webcams work right out of the box. Just plug it in, and it should show up as a camera option in Zoom, Google Meet, or Teams.
However, you'll be missing out on all the good stuff—advanced controls for color and brightness, zoom/pan features, auto-framing, and critical firmware updates. For example, without Logi Tune, you can't access the RightSight auto-framing feature on a Brio webcam, which automatically keeps you centered in the shot.
Installing the official Logitech software (like Logi Tune (opens new window)) is the best way to ensure you get top performance and stability from your camera. Without it, you might be leaving important bug fixes and feature enhancements on the table.
Managing your camera and mic during a call shouldn't add to your stress. With MuteDeck, you gain consistent, one-touch control over every meeting, no matter the platform. Stop hunting for buttons and stay focused on the conversation by visiting https://mutedeck.com (opens new window).