# How to Share My Screen on Any Platform
Alright, let’s get into the essentials of screen sharing. Think of it as the digital equivalent of pointing to something on a whiteboard or sliding a document across the table. It’s how we get everyone looking at the same thing, and doing it right is a fundamental skill for remote work.
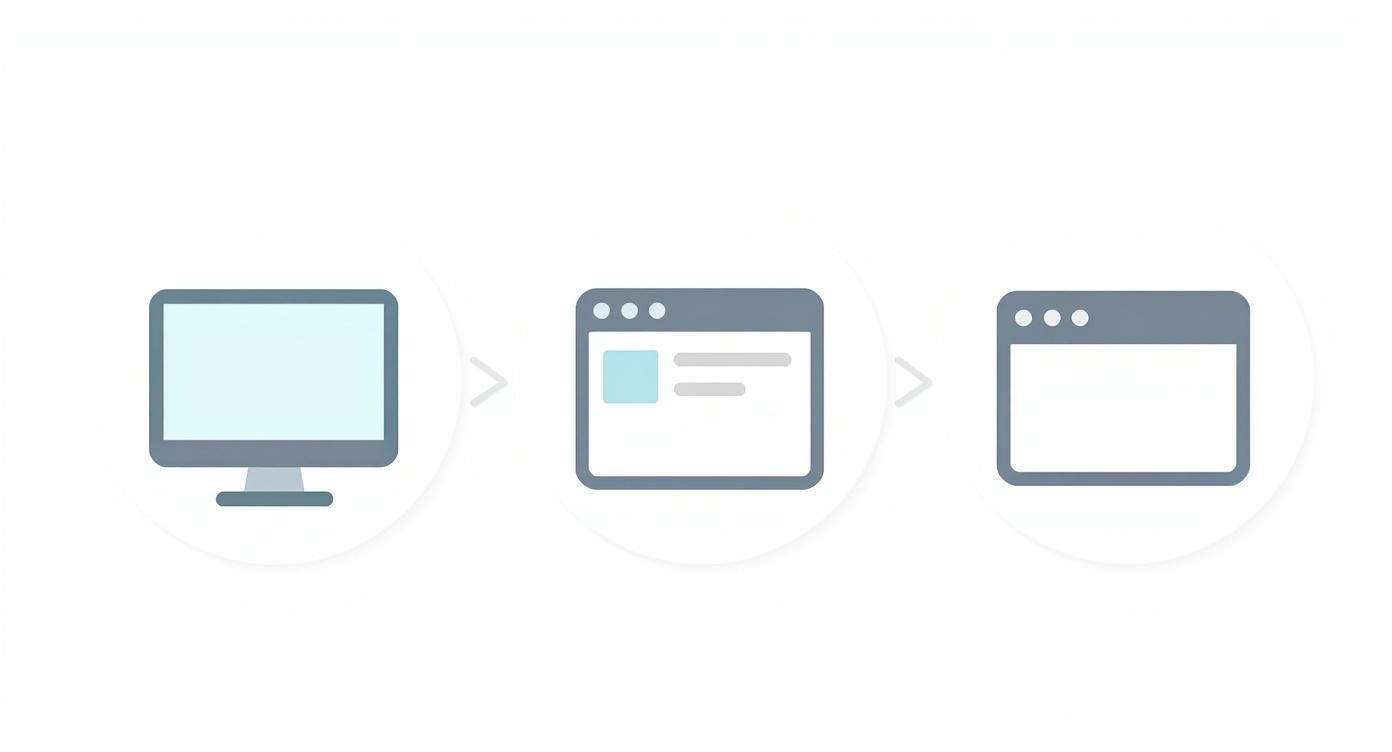
When you hit that "Share Screen" or "Present Now" button, you’re usually faced with a simple but critical choice: show your entire screen, a specific window, or just a single browser tab. Getting this choice right is the first step to a smooth, professional presentation.
The whole world of work relies on this now. Screen sharing software is a huge market—valued at around USD 682.2 million back in 2022 and projected to keep climbing. That’s because, from project kickoffs to client demos, it’s how business gets done. You can learn more about these market trends (opens new window) and what they mean for digital collaboration.
# Your Three Core Sharing Options
Every time you share, you have to decide what your audience sees. Understanding the difference between these options is key to avoiding those classic blunders, like accidentally broadcasting your Slack notifications or a messy desktop full of files.
Here’s a quick breakdown of what you'll see:
- Entire Screen/Desktop: This shows absolutely everything on your monitor. It's the go-to when you need to jump between different apps, like moving data from Excel into a PowerPoint deck.
- Application Window: This is more focused. It locks the view to just one specific app, like your code editor or a design tool. Anything happening outside that window stays completely private.
- Browser Tab: This is the most surgical option. It shares only a single tab in Chrome, Edge, or whatever browser you're using. It’s perfect for walking someone through a website or a Google Doc without revealing your other 50 open tabs.
The right choice completely depends on what you’re trying to do. If you're just walking through a slide deck, sharing only the PowerPoint window is the safest, cleanest way to go. No distractions.
Pro Tip: Always do a quick "dress rehearsal" before a big meeting. Start a call by yourself and share your screen. It takes five seconds and lets you see exactly what your audience will see, preventing you from accidentally showing a sensitive email or a distracting chat message.
# When to Use Each Sharing Method
Let's make this practical with a few real-world scenarios.
Say you’re a developer trying to show your team a bug. The best move is to share the specific application window where the bug is happening. This lets you walk them through the steps to reproduce it without exposing your entire desktop.
Now, imagine you’re in sales giving a product demo. Sharing your entire screen is probably your best bet. It lets you switch seamlessly between your presentation slides, the live product, and maybe a browser window with customer testimonials. The trick is to prep your desktop first: close every unnecessary app and flip on "Do Not Disturb" mode.
Finally, think of a team lead reviewing a new website design. Here, sharing a single browser tab is the way to go. It keeps everyone’s focus squarely on the website layout and prevents any stray notifications or other open tabs from derailing the conversation. It’s a small detail that shows you respect everyone’s time.
# Quick Guide to Screen Sharing on Major Platforms
Jumping between apps like Zoom (opens new window), Microsoft Teams (opens new window), and Google Meet (opens new window) can be a pain, especially when you’re just trying to find the share button. Each one puts it in a slightly different place and uses different shortcuts.
Here’s a quick reference table to help you find your bearings no matter which platform you're on.
| Platform | Where to Find the Share Button | Default Keyboard Shortcut (Windows/macOS) |
|---|---|---|
| Zoom (opens new window) | In the main meeting control bar, usually labeled "Share Screen" (green icon). | Alt+S (Windows) / Cmd+Shift+S (macOS) |
| Microsoft Teams (opens new window) | In the top-right of the meeting window, look for the "Share" button (an icon of a screen with an up arrow). | Ctrl+Shift+E (Windows) / Cmd+Shift+E (macOS) |
| Google Meet (opens new window) | In the bottom control bar, find the "Present now" button (an icon of a screen with an up arrow). | No universal default shortcut; varies by OS and browser setup. |
Bookmark this or keep it handy. Knowing these shortcuts can save you from that awkward fumbling moment when it’s your turn to present.
# Platform-Specific Screen Sharing Guides
Knowing what to share is half the battle. The other half is knowing how to share it on whatever platform you’re stuck with for the day. Every video conferencing tool has its own quirks and hidden gems, and mastering them is the difference between a clunky presentation and a smooth one.
Let’s walk through the exact steps for the big three—Zoom (opens new window), Microsoft Teams (opens new window), and Google Meet (opens new window)—so you can hit that share button with confidence. We'll go beyond the basics and dig into the features that can make your presentations more engaging, whether you're demoing software or leading a team sync.
This simple flow is a great reminder: choosing the right mode is key to keeping your audience focused and your messy desktop private.
# How to Share Your Screen on Zoom
Zoom is a beast when it comes to screen sharing, packed with options from a simple desktop view to collaborative whiteboards. Thankfully, its controls are pretty intuitive.
Look for the big green "Share Screen" button in your meeting controls, usually sitting at the bottom of the window. Clicking it brings up a menu where you pick exactly what your audience will see.
Here’s the rundown of your main choices:
- Desktop/Screen: Shows everything on your monitor. Perfect for when you need to jump between multiple apps, like showing a workflow that moves from a spreadsheet over to your project management tool.
- Window: This lets you share a single, specific application. It's my go-to for focused software demos, as it keeps my other windows and notifications completely hidden.
- Whiteboard: Fires up a digital canvas for you and your team to draw, type, and brainstorm on. It's a fantastic tool for hashing out ideas visually.
- iPhone/iPad: Lets you mirror your mobile device's screen, either wirelessly through AirPlay or with a good old-fashioned cable.
Practical Tip: If you're sharing a video clip in Zoom, you absolutely must check two little boxes at the bottom of the sharing pop-up: "Share sound" and "Optimize for video clip." Forgetting these is the fastest way to a choppy, silent video that leaves everyone confused.
If you’re a heavy Zoom user, getting these features down is a game-changer. For a deeper dive, check out our full guide on https://mutedeck.com/blog/2025-10-29-share-screen-on-zoom/ for more advanced tricks.
# How to Share Your Screen on Microsoft Teams
Microsoft Teams weaves screen sharing right into its collaborative fabric, with a particularly slick integration for PowerPoint. The whole process feels natural and is designed to keep you in the flow with your team.
You’ll find the "Share" button in the top-right corner of your meeting window—it’s the icon of a screen with an upward arrow. Clicking it slides out a panel with a few different sharing modes.
Teams has some unique tricks up its sleeve:
- PowerPoint Live: This is, without a doubt, the killer feature for presenters. Instead of just sharing your PowerPoint window, it uploads the presentation into the meeting. This gives you a special presenter view with your notes and a slide overview, while your audience gets a crisp, full-screen version. They can even click back and forth through the slides on their own.
- Window: Just like Zoom, you can isolate a single application window. It's the safest bet for sharing a document without accidentally flashing your inbox.
- Screen: Shares your entire monitor. You'll need this option if your presentation requires you to switch between different programs that aren't PowerPoint.
I use PowerPoint Live all the time for formal reviews. It lets me keep my speaker notes handy and see what’s coming next, all while the client sees nothing but a polished, high-quality presentation.
# How to Share Your Screen on Google Meet
Google Meet is all about simplicity and browser-based access, and its screen sharing is no exception. It's my top pick for quick, no-fuss collaboration, especially if you live in the Google Workspace ecosystem.
To get started, click the "Present now" button in the bottom control bar (it’s another screen-with-an-arrow icon). Google Meet keeps it simple with three distinct options.
Here’s what you get in Meet:
- Your entire screen: The classic choice for when you need to show things happening across multiple windows or desktop apps.
- A window: A great privacy-first option that locks the view to a single application, hiding everything else on your computer.
- A tab: This is where Meet really shines. It's optimized for sharing browser content, especially anything with audio or video. When you share a Chrome tab, the audio from that tab is shared automatically, making it the absolute best way to present a YouTube video or a web app with sound.
For instance, if I'm running a training session on a web-based platform, I'll always share just that browser tab. My attendees get a perfect view of the platform, and I can keep my personal notes open in another window without anyone ever seeing them.
While these three platforms have a huge chunk of the market, many teams are still searching for the perfect tool. If you're exploring different platforms, you might want to look into alternatives to Skype for modern teams (opens new window) to see what else is out there. Each one offers a slightly different spin on collaboration, and finding the right fit can make all the difference.
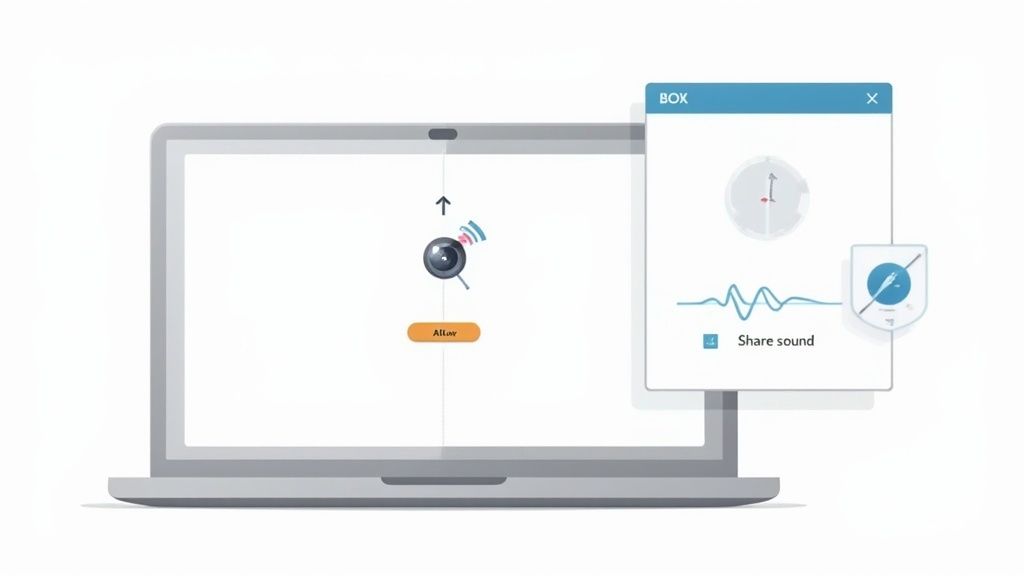
# How to Grant Permissions and Share Audio
Nothing kills the flow of a presentation faster than a security pop-up you can't bypass or a video your audience can't hear. These are, without a doubt, the two most common hurdles in screen sharing. Let's get them sorted so you can share your screen, permissions, and audio without a hitch.
The first time you try to share your screen, your computer's operating system—whether that's Windows or macOS—will probably step in with a security prompt. This isn't a bug. It's a feature designed to protect your privacy, making sure no app can record your screen without your explicit consent.
Getting this initial setup right is crucial. Granting these permissions correctly the first time will save you from that frantic scramble to fix things just as a big meeting is about to start.
# Navigating Screen Recording Permissions
Both macOS and Windows handle permissions a little differently, but the idea is the same. You have to tell your system that you trust your meeting app to view and broadcast what's on your screen.
On macOS: Apple's security is famously tight. The first time you share your screen on an app like Zoom (opens new window) or Teams (opens new window), you'll see a prompt asking for Screen Recording permissions.
- On the pop-up, click Open System Settings (or System Preferences on older versions).
- This will take you right to Privacy & Security > Screen Recording.
- Just find your app in the list (e.g.,
Google Chrome,zoom.us,Microsoft Teams) and flip the switch on. - You'll probably need to quit and restart the app for the change to stick. It's a one-time hassle that saves you future headaches.
On Windows: Windows is generally a bit more relaxed, but it still keeps an eye on your camera and microphone. If an app can't seem to share, the issue is often buried in your privacy settings. You'll usually find these under Settings > Privacy & security.
Picture this: You're about to demo a new feature to a huge client. You hit "Share Screen" on your Mac, and... nothing. Just an error message. By going into your System Settings ahead of time and pre-authorizing your main meeting apps, you completely sidestep this stressful, unprofessional moment.
# Don't Forget to Share Your Audio
Sharing your screen is only half the battle if your presentation has sound. Playing a slick promo video or a product sound effect in dead silence is a surefire way to lose your audience.
Almost every platform has a simple checkbox for this, but it’s incredibly easy to miss when you're rushing to get started.
Keep an eye out for these phrases when you open the screen share menu:
- Zoom: A checkbox labeled "Share sound" in the bottom-left corner of the sharing window.
- Microsoft Teams: A toggle switch called "Include computer sound" at the top of the sharing tray.
- Google Meet: Sharing a Chrome Tab is your best bet here, as audio shares by default. If you share a window or your entire screen, the audio option might not be available or as reliable.
This one simple click is probably the most overlooked part of learning how to share my screen. Making a habit of checking that box will instantly make you look more polished. For a deeper dive, our guide on how to share your screen on a PC (opens new window) has extra tips just for Windows users.
Here’s a great pro-tip: do a quick audio check before the meeting starts. Find a YouTube video, mute it, and then share your screen with the audio option enabled. Ask a colleague if they can see the audio indicator light up when you unmute the video. This quick test confirms everything is working perfectly.
# Pro Tips for Professional Screen Sharing
Knowing how to share your screen is one thing. Doing it like a pro is something else entirely. Moving past the basics is what turns your presentations from just okay to genuinely impressive. It’s all about creating a seamless, distraction-free experience for your audience so they stay focused on your message, not a random pop-up or a messy desktop.
Think of it as a pre-flight check. Before you even click "Join," take a minute to get your digital space in order. Close every browser tab and app you don't absolutely need. This simple habit does two things: it cuts down the risk of accidentally showing something personal and frees up system resources for a smoother, less laggy share.
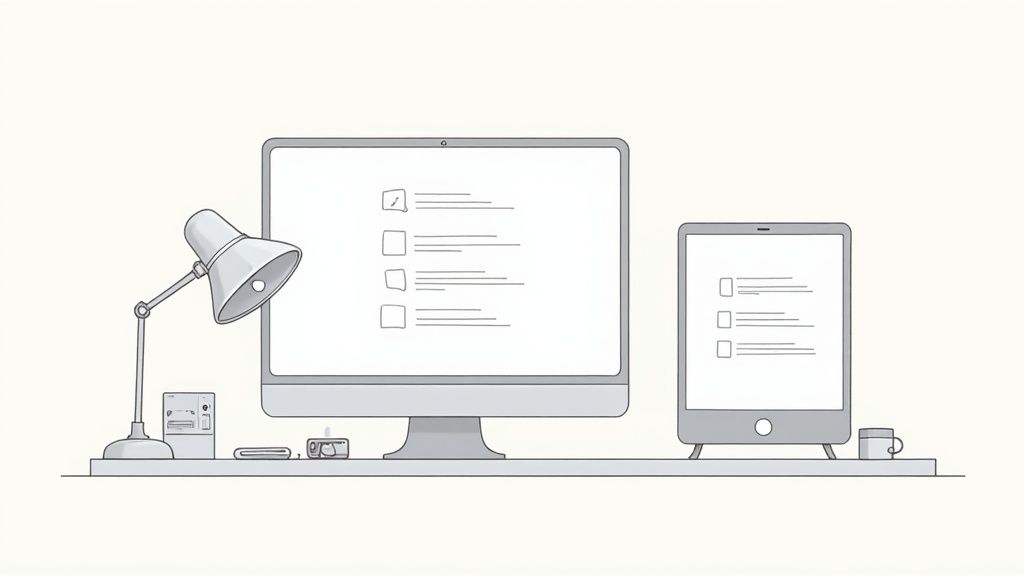
# Master Your Digital Presentation Space
Treat your screen like a stage. You wouldn't leave random props lying around during a live performance, and the same idea applies here. Your goal is to guide your audience's attention exactly where you want it.
One of the easiest ways to do this is with your operating system's built-in focus mode.
- On Windows: Use "Focus" (formerly Focus Assist) to silence notifications from apps and people.
- On macOS: Flip on a "Do Not Disturb" or custom "Focus" mode to stop banners and alerts from popping up mid-sentence.
It's a small action that prevents an embarrassing personal message or a system update from throwing you off your game. And if you're presenting for a while, remember to take care of your eyes. Staring at a screen for hours is draining, so it pays to know about identifying and alleviating digital eye strain symptoms (opens new window).
A Practical Tip from Experience: Before a big client call, I create a new, empty folder on my desktop and drag everything else into it. This gives me a completely clean, professional backdrop that reinforces a polished and organized image.
To help you get into this habit, I've put together a quick checklist. Run through these steps before your next important meeting.
# Screen Share Privacy and Professionalism Checklist
| Checklist Item | Why It's Important | Quick Tip |
|---|---|---|
| Close Unnecessary Apps/Tabs | Prevents accidental shares of personal info and frees up computer resources. | Use a separate browser profile for work presentations to keep personal bookmarks and history hidden. |
| Silence Notifications | Keeps embarrassing or distracting pop-ups from appearing on screen. | Learn the keyboard shortcut for your OS's focus mode for a quick on/off switch. |
| Clean Your Desktop | A cluttered desktop looks unprofessional and can distract your audience. | Keep a "Temp" folder on your desktop to quickly drag clutter into before a call. |
| Check Your Background | Your desktop wallpaper should be neutral and professional. | A solid color or subtle brand logo works great. Avoid personal photos or busy patterns. |
| Have Content Ready | Fumbling to find a file mid-presentation breaks the flow and wastes time. | Open all your documents and tabs in the order you'll present them. |
| Choose the Right Share Option | Sharing your whole screen when you only need one window can expose private information. | Default to sharing a specific Window or Tab unless you absolutely need to show your entire desktop. |
Making these checks a routine part of your pre-call setup will make your presentations smoother and far more professional.
# Leverage Advanced Sharing Features
Modern meeting platforms offer a lot more than a simple full-screen mirror. Digging into these features can make your presentations more dynamic and engaging.
For example, tools like Zoom let you share just a portion of your screen. This is fantastic for a focused demo where you only want the audience to see a specific part of a complex app, hiding everything else. Another powerful tool is real-time annotation. You can use built-in drawing tools to circle a key stat on a chart or underline an important sentence, physically guiding your audience’s eyes where you want them.
The tech behind all this is moving fast. The wireless display market, a closely related field, was valued at USD 6.03 billion in 2024 and is projected to hit USD 19.86 billion by 2034. This explosion shows a clear demand for more flexible ways to share what's on our screens, pushing the boundaries of what's possible in our meetings.
# The Dual-Monitor Advantage
If you present regularly, a second monitor is one of the best investments you can make. It fundamentally changes how you work, giving you a private "backstage" area while you present on your main "stage."
Here’s how to make it work for you:
- Set up your space. Before the meeting starts, put your presentation on one screen (your "stage") and your speaker notes, the private chat, and meeting controls on the other (your "backstage").
- Share the right screen. When you hit "Share Screen," be deliberate. Choose only the monitor with your presentation content.
- Present with confidence. Now you can glance at your notes, see questions pop up in the chat, and manage participants—all without your audience seeing a thing.
This setup eliminates that awkward fumbling as you switch between windows on a single screen. It makes your delivery look effortless and keeps your presentation the star of the show.
# How to Fix Common Screen Sharing Issues
We’ve all been there. You’re ready to share a critical report, and suddenly you’re staring at a grayed-out button or, worse, getting messages that your team only sees a black screen. These glitches are maddening, but they’re almost always fixable.
Most of the time, the problem boils down to just a few culprits: permissions, outdated software, or a strained network connection. If you tackle the problem methodically, you can get your presentation back on track without completely derailing the meeting.
Let’s break down the usual suspects and how to handle them.
# The Share Button Is Grayed Out
This is probably the first roadblock you'll hit, and it almost always points to a permissions problem—either from your computer or the meeting host. If the "Share Screen" or "Present" button is unclickable, the host has likely restricted screen sharing.
Don't panic. Just send a quick message in the chat asking the host to enable sharing for participants. Most of the time, it’s just an oversight.
If the host confirms that sharing is enabled, the issue might be on your end. This is especially common if you’re using the browser version of a meeting app. Sometimes, a rogue browser extension can interfere with the meeting controls. If that sounds like your situation, you can find more detailed steps for resolving common browser extension issues (opens new window).
# Your Viewers See a Black Screen
You’ve shared your screen, but your audience just sees an empty void. This classic problem often points to a graphics card or driver conflict, especially on Windows machines that juggle multiple GPUs.
Here are a few things to try, in order:
- Update Your App: First things first, make sure your meeting client (like Zoom (opens new window) or Teams (opens new window)) is fully updated. A pending update is a common source of weird bugs.
- Disable Hardware Acceleration: Dig into your meeting app's video settings and look for an option called "Hardware Acceleration." Turning this off forces the software to use a more basic rendering method that often sidesteps graphics driver conflicts.
- Restart and Rejoin: The oldest trick in the IT book still works wonders. A quick restart of the application can clear out temporary glitches causing that black screen.
Real-World Scenario: A designer on my team kept getting the black screen error in Teams. It turned out her laptop was struggling to switch between its integrated and high-performance graphics cards. Disabling hardware acceleration in her Teams settings fixed it for good.
# Shared Audio Is Not Working
You’re playing a video, and all your audience gets is silence. This happens because you have to explicitly tell the app to share your computer’s audio along with the visuals.
When you click to share your screen, look carefully for a checkbox or toggle. The wording is slightly different on each platform, but it’ll say something like:
- "Share sound" on Zoom (opens new window)
- "Include computer sound" on Microsoft Teams (opens new window)
If you forget to check this box before you start sharing, you’ll have to stop the share completely and start over. This time, make sure to enable the audio option. It’s one of the most common mistakes people make, but once you know to look for it, it becomes second nature.
# Unify Your Workflow with MuteDeck
Jumping between Zoom (opens new window), Microsoft Teams (opens new window), and Google Meet (opens new window) is a daily reality for most of us, but wrestling with each platform's unique way of sharing your screen is a real drag. Every app has its own layout, its own shortcuts, its own quirks. That mental gear-switching is exactly what leads to fumbling for the right button at the worst possible moment.
What if you could ditch the on-screen chaos and control screen sharing with a single, consistent action, no matter which app you're in? That’s the whole idea behind MuteDeck (opens new window). It pulls your most important meeting controls out of the software and puts them right on your desk.
# A Real Button for a Digital Action
MuteDeck lets you start and stop your screen share with one press of a physical button. Think about it: you’re a consultant hopping from a client call on Teams to an internal sync on Zoom. Instead of frantically hunting for the "Share" icon that's in a different spot every time, you just hit a dedicated key on your Elgato Stream Deck (opens new window) or other supported hardware.
It's all about building muscle memory. You're no longer guessing where the button is or panicking when an app updates its interface overnight. Your focus stays where it should be—on your presentation, not the software.
This idea of bridging the physical and digital worlds is becoming a bigger deal. The constant context-switching we do all day leads to burnout, but tangible controls give us a way to anchor our digital actions in a consistent, real-world experience.
# Staying Ahead of a Growing Trend
Let's be honest, screen sharing isn't going anywhere. In fact, its use is exploding. Global forecasts show the market for screen sharing software is on track to grow from about USD 715 million in 2024 to over USD 1,079.1 million by 2030. It’s become an essential part of how we collaborate.
As more companies lean on these tools, the need for a simplified, unified experience is more critical than ever. You can read up on the expanding market over on Valuates Reports.
MuteDeck cuts right through that complexity. It creates a standardized workflow that works across the fragmented mess of meeting apps. By making sure your core controls are always in the same place, you not only streamline your own day but also make your presentations look and feel way more professional.
# Got Questions About Screen Sharing? We've Got Answers.
Even the most seasoned presenters run into a snag or two when sharing their screen. It happens. Here are some quick answers to the most common questions we hear, designed to get you out of a jam and back to presenting like a pro.
# Can People See My Pop-Up Notifications?
Yes, they absolutely can. If you're sharing your entire screen, every single notification that pops up—a Slack message, an email preview, a calendar reminder—is on full display for your audience. It's probably the most common way private or embarrassing info gets leaked in a meeting.
To avoid this, get in the habit of enabling your computer's "Do Not Disturb" or "Focus" mode before you click share. Better yet, make it a rule to only share a specific application window instead of your whole desktop. It's the safest way to go.
# Why Is My Shared Video So Choppy?
A choppy video stream is almost always a sign that your computer is overloaded or your internet connection is struggling to keep up. Sharing video, especially with a lot of motion, is a heavy lift for both your CPU and your network bandwidth.
A simple pro tip: close everything you don't absolutely need for the presentation. I'm talking about background apps like Dropbox or OneDrive, extra browser tabs, and anything else eating up resources. A lighter load on your system almost always means a smoother show for everyone else.
Also, look for a setting called "Optimize for video clip" in your meeting app. Ticking that box tells the software to prioritize a high frame rate and smooth playback, and it makes a world of difference.
# Can I Share My Screen From My Phone?
You bet. Modern meeting apps from Zoom (opens new window), Google Meet (opens new window), and Microsoft Teams (opens new window) have fantastic mobile versions that let you share your screen right from your phone or tablet. It's a lifesaver for presenting on the go or demoing a mobile app.
The process is pretty much the same as on your desktop. Just look for the "Share" or "Present" button in the app's controls. You'll get options to show your entire screen, a photo, or a document you have saved on your device.
Tired of hunting for the right screen share button in a different app every time? MuteDeck gives you one physical button to rule them all. Share and stop sharing your screen instantly, no matter what platform you're on. See how MuteDeck can simplify your meetings (opens new window).