# How to Share a Screen on Any Device
Knowing how to share your screen is pretty simple on the surface: you hit the "Share" or "Present" button and pick what you want to show. But the real skill lies in choosing the right option—showing your entire screen, a single app, or just one browser tab. Getting this right is what separates a smooth, professional presentation from an embarrassing one.
# Your Quick Guide to Screen Sharing
Screen sharing has become a daily driver for anyone working remotely. It’s how we show off new designs, walk through software, or just hash out ideas on a project together. It's no longer a niche feature; it's a core part of how millions of us collaborate.
The numbers back this up. The global screen sharing software market hit around USD 715 million in 2024 and is still climbing. If you're curious, you can explore more data on the screen sharing software market (opens new window) to see just how essential this tech has become.
At its heart, sharing your screen is all about controlling what your audience sees. You've got three main ways to do it, and each one is built for a different job.
# The Three Main Ways to Share
Getting comfortable with these options is the first step to sharing with confidence. Each mode offers a different level of privacy and focus, so picking the right one is crucial.
- Entire Screen: This is the "show everything" mode. It broadcasts your whole desktop—notifications, taskbar, every open window. It’s perfect when you need to jump between different programs, like showing a slide deck, then a website, and finally a spreadsheet to look at the numbers.
- Application Window: A much more focused approach. You choose one specific app, like Photoshop or a Word doc, and your audience only sees that window. This is my go-to for software demos or when I'm reviewing a document and don't want a stray chat message popping up for everyone to see.
- Browser Tab: This is the most private option. It locks the view to a single tab in your browser. It’s the best choice when you just need to show a specific webpage or web app without revealing all your other open tabs or your bookmarks bar.
# Which Screen Share Option Should You Use?
Still not sure which one to pick? This quick table breaks it down.
| Share Mode | Best For | Key Benefit |
|---|---|---|
| Entire Screen | Presenting with multiple apps (e.g., PowerPoint, browser, and Excel). | Maximum flexibility. Your audience sees exactly what you see. |
| Application Window | Software demos, document reviews, or focused walkthroughs. | Prevents distractions and accidental oversharing of other windows. |
| Browser Tab | Showing a single webpage, web app, or online document. | Highest level of privacy. Keeps other tabs and browser UI hidden. |
Ultimately, the best choice depends on what you need to accomplish. For most day-to-day tasks, sharing a single application window or a browser tab is the safest and most professional bet.
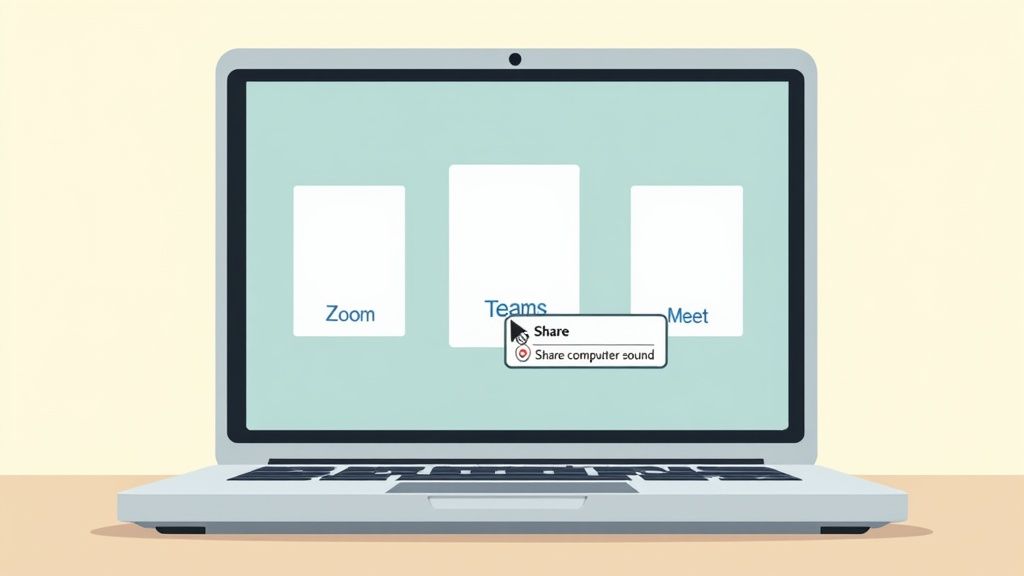
# Sharing Your Screen on Zoom, Teams, and Meet
Let's get specific. You're probably bouncing between Zoom (opens new window), Microsoft Teams (opens new window), and Google Meet (opens new window) all day. While they all nail the basics of screen sharing, each one has its own little quirks and layouts. Knowing the small differences is what keeps you from fumbling for the right button mid-presentation.
The core idea is the same across the board. You’ll hunt for a button—usually labeled "Share" or "Present"—in the main control bar. Clicking it pops open a menu where you can pick what to show: your entire screen, a single application window, or just one browser tab.
But the real devil is in the details, often hidden in a tiny, easy-to-miss checkbox.
# Enabling System Audio for Videos
Ever tried to share a YouTube clip or a product demo with sound, only to get blank stares from your audience? The culprit is almost always the forgotten "Share computer sound" option. Each app tucks this crucial toggle in a slightly different spot.
- Zoom: The checkbox for "Share sound" is right in the bottom-left corner of the first screen share window. It’s impossible to miss if you know to look for it.
- Microsoft Teams: Find the "Include computer sound" toggle in the top-right of the sharing panel. Just flick the switch on.
- Google Meet: When you opt to share a Chrome tab, the "Share tab audio" checkbox appears in the bottom-left of the pop-up. This is the best—and often only—way to get clean audio in Meet.
Forgetting this is probably the most common screen sharing mistake. Burn it into your brain to check for it every single time. It will save you from the awkward "we can't hear anything" interruption.
# Handling First-Time Permission Prompts
The very first time you try to share your screen, especially on a Mac, your computer will probably put up a fight. Both macOS and Windows need you to explicitly allow apps like Zoom or Teams to record your screen. It’s a one-time setup, but it can trigger a full-blown panic if it happens two minutes before a big meeting.
On macOS, you'll have to navigate to System Settings > Privacy & Security > Screen Recording. From there, find your meeting app in the list and flip the toggle on. You’ll almost always need to quit and restart the app for the change to stick.
Windows is usually a bit more forgiving, throwing up a standard permission pop-up on your first attempt. But if you're on a corporate machine, these settings might be locked down by IT. It pays to test your setup well before your first important presentation.
Pro Tip: Always do a quick test share before your meeting starts. Jump on the call five minutes early with a colleague, share your screen, and ask them to confirm they can see and hear everything correctly. This simple check catches permissions hiccups and audio fails before anyone else joins.
# Practical Scenarios and Best Practices
Knowing where the buttons are is one thing. Knowing which button to use for a specific situation is what makes you look like a pro.
For example, if you’re presenting a PowerPoint deck on Zoom, don't just share the entire app. Start your slideshow first, then dive into Zoom’s advanced sharing options and select "Portion of Screen." You can draw a box around just the slide, which frees you up to see your presenter notes on the side without your audience ever knowing. We cover more tricks like this in our complete guide on how to share a screen on Zoom (opens new window).
When demoing a web app in Google Meet, always choose to share a "Browser Tab" instead of your entire window. This does two things: it protects your privacy by hiding your other 50 open tabs and gives your viewers the smoothest video and audio playback possible, since Meet is built to handle Chrome tabs perfectly.
These small, intentional choices are what separate an amateur presentation from a professional one.
# How to Share Your Screen Like a Pro
Knowing how to share your screen is one thing. Doing it smoothly, without fumbling for the right window or accidentally showing your team your weekend plans, is what sets the pros apart. The real magic happens before you even click that little green button.
Think of it like a stage performer checking their mic before going live. A quick, 30-second check of your digital workspace can save you from embarrassing pop-ups, frantic scrambling, and looking like you've never used a computer before.
# Prepare Your Digital Workspace
First things first: clean up the clutter. Close every application and browser tab that isn't directly part of your presentation. This isn't just about looking tidy—it also frees up precious system resources, helping you avoid that dreaded lag while you're trying to make a point.
Next, go silent. Every modern operating system has a "Do Not Disturb" or "Focus" mode. Use it. This is non-negotiable. A stray chat message from a friend or a personal email notification can instantly torpedo your professional credibility.
Finally, take a look at your desktop. If you plan on sharing your entire screen, a desktop littered with random files named "screenshot-final-final-v2.png" just looks messy. Have a clean, neutral background ready. It's a small detail that screams organization. And while you're at it, remember that you're broadcasting from your network—reviewing some basic home network security best practices (opens new window) is always a smart move.
# Master Your Presentation Environment
Once your digital space is prepped, give your physical setup some thought. A second monitor is an absolute game-changer for presenters. Seriously. It lets you keep your presentation on one screen while your meeting controls, participant list, and private notes are visible on the other.
This setup single-handedly eliminates that awkward moment where you have to stop talking, minimize your slides, and ask, "Sorry, I can't see the chat, did someone have a question?" You can see feedback in real-time and address it on the fly, making the whole thing feel more like a conversation.
A dual-monitor setup transforms screen sharing from a one-way broadcast into a dynamic conversation. You can see your content and your audience simultaneously, which is key to maintaining engagement and control.
If you present often, automating the little things can make you look like a seasoned pro. You can even use tools like a Stream Deck to manage your entire meeting with physical buttons. Check out how you can start controlling your meeting setup with a Stream Deck (opens new window).
# Engage Your Audience Actively
Just talking over a static slide is the fastest way to get your audience to start checking their email. Most meeting platforms have built-in annotation tools—and you should absolutely be using them.
- Highlight Key Points: Don't just say something is important; grab the highlighter tool and draw a circle around it. Underline a key phrase as you're speaking. It keeps eyes on the prize.
- Use the Spotlight: Many tools have a laser pointer or spotlight feature. This is perfect for guiding your audience's focus on a busy spreadsheet or a complex diagram. You control exactly where they look.
- Encourage Interaction: Turn it into a two-way street. Ask viewers to use the annotation tools themselves. "Everyone drop a stamp on the option you agree with." Simple, fast, and effective.
This isn't just about showing off fancy features. It's about actively guiding your audience's attention and making them part of the presentation. They won't just be passively watching—they'll be participating.
# Troubleshooting Common Screen Sharing Glitches
We’ve all been there. You’re in the middle of a killer presentation, and suddenly your audience sees a black screen. Or you’re sharing a video, but nobody can hear a thing. It’s frustrating, but don’t sweat it—most of these glitches are easy to fix once you know what to look for.
A black screen is usually a sign of a graphics card conflict or an out-of-date meeting app. Many modern computers have multiple graphics cards, and sometimes the meeting software gets confused about which one to use. The quickest fix? Try restarting the application or making sure it's fully updated. That often forces everything to sync back up.
Poor connections can also cause sharing to fail, especially with the wild variety of screen resolutions out there. While 1920x1080 is the most common desktop resolution, your meeting app is constantly juggling that with different aspect ratios from phones and tablets, all while dealing with fluctuating internet speeds. You can see the latest screen resolution stats (opens new window) to get a sense of just how much of a moving target this is for developers.
# Solving Audio and Permission Errors
If your audience can’t hear the audio from your shared content, it’s almost always one of two things. First, did you remember to tick the "Share computer sound" box when you initiated the screen share? It’s an easy one to miss. Second, double-check that your computer’s main sound output is actually set to the device you’re using, whether that’s your headphones or speakers.
Permissions are another common headache, especially on Macs or locked-down corporate laptops. Your operating system might be blocking screen sharing by default for security reasons. You'll need to jump into your system settings—typically under Privacy & Security > Screen Recording—and give your meeting app explicit permission to share your screen.
This can also apply to control software. If you use a tool like MuteDeck to manage your meetings and it suddenly can't find your meeting app, a permissions reset is often the culprit. We have a specific guide to walk you through it if you get stuck; just check out our guide on troubleshooting app detection (opens new window).
The Quick Fix Checklist:
- Black Screen? Update your meeting app and graphics drivers. If that doesn't work, a simple restart of the application usually does the trick.
- No Audio? Make sure the "Share Sound" box is checked in your meeting tool and that your system's audio output is set correctly.
- Permission Denied? Dive into your system's security settings and manually grant "Screen Recording" access to your meeting application.
# Take Your Screen Sharing to the Next Level with MuteDeck
Once you've got the basics down, you might start thinking, "there has to be a better way." For anyone who lives in virtual meetings, manually fumbling for the share button mid-sentence feels clumsy and breaks your flow. This is where you can ditch the built-in controls and start making things feel a lot more professional.
Enter tools like MuteDeck. When you pair it with a physical device like an Elgato Stream Deck (opens new window) or a Loupedeck (opens new window), your whole presentation game changes. Instead of hunting for icons with your mouse, you can assign your most common screen sharing actions to physical buttons. Imagine starting your slideshow with a single, confident tap.
This isn't just about making your life easier; it's about looking polished and in control. The market for screen mirroring apps—a huge part of this ecosystem—is predicted to explode from nearly USD 750 million in 2025 to USD 2.5 billion by 2033. Businesses are driving over 60% of that growth, which tells you just how much demand there is for smoother, more reliable presentation tools. You can dig into more of the screen mirroring technology growth stats on datainsightsmarket.com (opens new window).
# Your One-Touch Command Center
Setting up a dedicated control pad for your meetings is way easier than it sounds. The idea is to offload all those repetitive clicks to a single button press, so you can keep your focus where it belongs: on your audience and your content.
Here are a few things you could set up right away:
- Dedicated App Share: Program a button to instantly share a specific app, like PowerPoint or Keynote. No more scrolling through a list of twenty open windows while everyone watches. One tap, and you're live.
- Instant Stop Share: Have a big red "Stop Sharing" button at the ready. It's perfect for cleanly ending a segment or quickly hiding your screen if an embarrassing notification pops up.
- Audio On/Off: Assign a button to toggle your computer's audio sharing. This is a lifesaver when you need to play a video with sound and don't want to dig through menus to find the setting.
The MuteDeck (opens new window) interface gives you a central place to manage all these controls, no matter which meeting platform you’re using.
This screenshot gives you a peek at how you can run everything from a single, unified panel, whether you're in Zoom, Teams, or Meet.
# Put Your Meeting Workflow on Autopilot
Beyond just single button presses, you can start building simple automations to make things even smoother. For example, you could set up a script that automatically shares your Google Chrome browser tab the second your weekly team meeting starts in Google Meet.
This is how you remove all the little points of friction that can derail a great presentation. When you automate the mechanics of sharing your screen, you free up mental bandwidth to focus on what actually matters: landing your message and connecting with your audience.
With a setup like this, you can start every meeting without that awkward "hang on, let me just... can you see my screen now?" dance. The technology just fades into the background, letting you take center stage.
# Common Questions About Screen Sharing
Even after you've got the basics down, a few common "what if" scenarios always seem to pop up. Let's tackle the most frequent questions we hear so you're ready for anything.
# Can People See My Notifications When I Share My Screen?
Oh, absolutely. And it's one of the easiest ways to accidentally broadcast a private chat message or a sensitive email preview to your entire audience. If you share your Entire Screen or Desktop, everything that happens on that screen is fair game.
You've got two great ways to prevent this:
- Go into Focus Mode: Before you even click the share button, turn on your computer’s "Do Not Disturb" or "Focus" mode. It's a lifesaver that silences all those pop-ups.
- Share a specific window: This is the safest bet. By sharing just one Application Window, you limit the view to that app. Any notifications that appear elsewhere on your desktop stay completely private.
# How Do I Share My Screen From a Phone?
Most mobile meeting apps have you covered. Look for a big "Share" or "Present" button right in the main controls for apps like Zoom (opens new window) and Google Meet (opens new window). Tapping it usually gives you the option to broadcast your entire screen.
If you're on an iPhone or iPad, you'll first need to enable screen broadcasting from the Control Center. Android is a bit more direct—it just asks for permission right inside the app, which makes it a tad quicker to get going.
A quick word of advice: Sharing from your phone is perfect for a quick update or showing off a mobile app. But for a formal presentation? Stick with a laptop or desktop. It gives you far more control and provides a much more stable, professional view for your audience.
# Why Is My Shared Video So Choppy?
Nine times out of ten, a choppy video feed comes down to a weak or overloaded internet connection. Wi-Fi is often the culprit, especially if you share your network with others who might be streaming movies or gaming.
The single best fix is to plug your computer directly into your router with an Ethernet cable. It’s a simple move that provides a much faster and more reliable connection. It also helps to close out any apps and browser tabs you aren't using to free up your computer's resources.
For a deeper dive into video issues and other technical fixes, you can always consult the Vidfarm blog (opens new window).
# Can I Still See Participants While I'm Sharing?
Yes, and you absolutely should. Platforms like Zoom and Microsoft Teams (opens new window) show participant videos in a small floating window you can drag around your screen. Just move it to a corner where it won't block important content.
But if you really want to level up your presentation game, use a second monitor. This setup is a game-changer. You can dedicate one screen entirely to your shared content while keeping the main meeting window—with all the video feeds, chat, and participant list—fully visible on your other screen.
Stop fumbling for buttons and start running your meetings with confidence. MuteDeck gives you a single, reliable control center for Zoom, Teams, Meet, and more, right on your desktop or Stream Deck. Try it free and see the difference. Learn more at https://mutedeck.com (opens new window).