# How to Do a Webinar That Gets Real Results
Before you think about cameras or software, you need a plan. A great webinar feels effortless to the audience, but that’s because of the prep work that happens behind the scenes. This is where you define your goal, get inside your audience's head, and map out your content and promotion.
# Your Blueprint for a Flawless Webinar
A successful webinar starts with a documented plan. Without this blueprint, you risk hosting an event that misses the mark and wastes everyone's time. Think of it like laying the foundation for a house. If you skip this part, everything you build on top will be wobbly.
First, define one specific goal. Why are you hosting this? Trying to do too much at once dilutes your message and confuses people.
- Lead Generation: Is the main point to fill your sales pipeline? If so, your content and call-to-action should be focused on capturing info and booking demos.
- Customer Training: Are you teaching existing customers how to use a new feature? Here, the goal is practical, step-by-step guidance that helps them get more value from your product.
- Product Demo: Is your goal to show potential buyers how you solve their biggest problem? The content needs to be persuasive and loaded with benefits, not just features.
Once that objective is clear, everything else falls into place.
# Know Your Audience and Their Problems
You’re not talking to a faceless crowd. You’re speaking to people with specific challenges. The better you understand their pain points, the more your content will connect. Don't guess what they need.
Find out directly. Survey your email list. Dig into your most common customer support tickets. See what people are complaining about on social media. For instance, if you sell project management software and support tickets are flooded with "trouble collaborating with my team," your webinar topic is staring you in the face: "5 Ways Our Platform Streamlines Team Collaboration."
This way, you’re offering solutions they're already looking for.
# Outline Your Content and Promotion
With a clear goal and an understanding of your audience, outlining the content gets easier. Think of it as a story with a beginning, middle, and end.
- The Hook (First 5 Minutes): Start with a shocking statistic, a relatable story, or a bold promise. Grab their attention immediately.
- The Core Content (30-40 Minutes): This is where you deliver the goods. Break down your main ideas into digestible chunks. Use visuals, real-world examples, and data to back up what you're saying.
- The Call-to-Action (Final 5 Minutes): Tell the audience exactly what you want them to do next. "Download the guide." "Book a demo." "Use this discount code." Make it obvious and simple.
Your webinar is an investment, not just a presentation. B2B marketers report that 73% of their high-quality leads come from webinars, with these events converting anywhere from 5-20% of viewers into buyers. With the webinar market projected to hit $4.44 billion by 2025, nailing the execution matters more than ever. Find more details in this extensive report on webinar statistics (opens new window).
Promotion is just as important as the content. You can have the best webinar in the world, but it means nothing if no one shows up. Start promoting at least two weeks out. Data shows 24% of all registrations happen on Tuesdays, making it a good day for your email blasts. Thursdays tend to be the best day to host for a live audience. As you build out your blueprint, exploring proven strategies to increase webinar attendance (opens new window) is a must.
Finally, put thought into your registration page. It needs to clearly sell the value: what will attendees learn, and why is it worth an hour of their time? Add speaker bios and keep the sign-up form short. A clean, compelling page can make a big difference in your sign-up rate.
# The Technical Pre-Flight Checklist
Your content could be groundbreaking, but if your tech fails, so does your webinar. Technical glitches are the fastest way to lose an audience. A solid pre-flight check is the difference between a smooth broadcast and a chaotic mess.
This process starts with picking the right platform. Don't just default to what you know. Think about what you need. How many people are coming? Do you need interactive features like polls or breakout rooms? What’s your budget?
# Choosing Your Platform
The right tool makes a difference. Here’s a quick rundown of the big players:
- Zoom Webinars (opens new window): The workhorse. It’s a solid choice for large audiences, and its Q&A panels and attendee reporting are top-notch. Most people already know how to use it.
- Microsoft Teams Live Events: A great option for internal corporate events, especially if your company already lives inside the Microsoft ecosystem.
- Google Meet (opens new window): Simple, accessible, and good for smaller, more informal sessions where you don’t need all the bells and whistles.
- Webex Webinars (opens new window): A veteran in the space, offering robust security and reliability for enterprise-level events.
To make the choice easier, here's how they stack up on key features.
# Webinar Platform Feature Comparison
Choosing a platform can feel overwhelming, but breaking it down by the features you'll actually use can simplify the decision. This table compares some of the most common webinar tools.
| Feature | Zoom Webinars | Microsoft Teams Live Events | Google Meet | Webex Webinars |
|---|---|---|---|---|
| Max Attendees | Up to 50,000 | Up to 10,000 | Up to 500 (Enterprise) | Up to 100,000 |
| Interactive Polls | Yes | Yes | Yes | Yes |
| Q&A Module | Yes | Yes (Moderated) | Yes | Yes (Moderated) |
| Breakout Rooms | Yes | No | Yes | Yes |
| Recording & Transcripts | Yes | Yes | Yes | Yes |
| Registration Pages | Yes | Yes | No | Yes |
| Integrations | Extensive (CRM, Marketing) | Good (Office 365) | Limited (Google Workspace) | Good (Salesforce, Marketo) |
The "best" platform depends on your specific goals—whether that's maximum reach, deep interaction, or seamless integration with your existing workflow.
# Your Hardware and Software Setup
Once you've picked a platform, dial in your hardware. Bad audio is the number one webinar killer. A quality USB microphone isn't a luxury; it's a necessity.
Record yourself speaking and listen back. Do you sound clear? Is there an annoying hum? Are you clipping? Fix it now, not when you’re live.
Your camera and lighting are just as important. You don't need a Hollywood budget, but you do need to be seen clearly. A dedicated webcam will always beat your laptop's built-in camera. Position a light source in front of you—a simple lamp or a ring light works wonders to get rid of shadows. And please, tidy up your background.
Now for the software. Before every session, double-check your audio and video settings inside the webinar app. Confirm your good mic and camera are actually selected. It's a five-second check that prevents that "Can you hear me now?" panic.
Screen sharing is another common tripwire. Modern operating systems are picky about security and often require you to grant screen-sharing permissions ahead of time. Do a full test run to make sure they're enabled. If you've ever gotten stuck, we have a helpful guide on how to share your screen on Zoom (opens new window).
This blueprint lays out the path from big idea to final content.
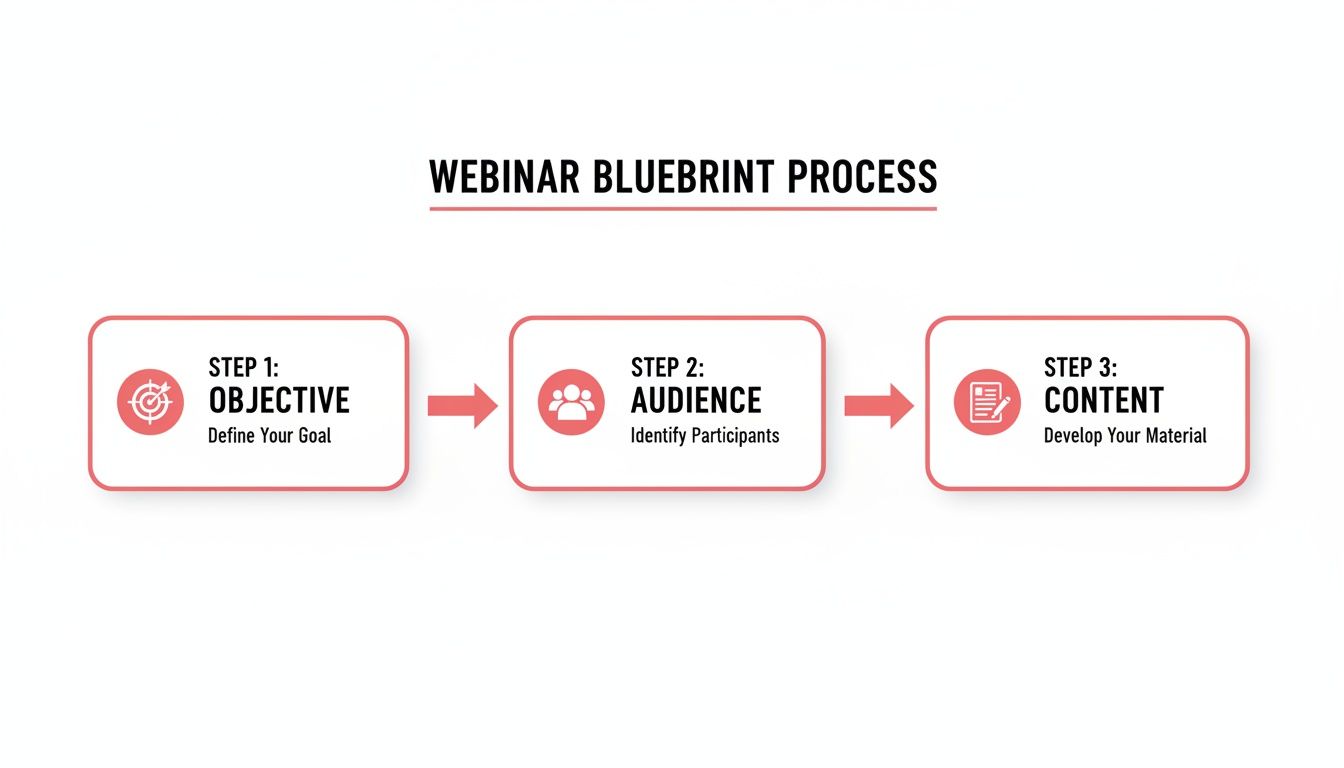
Each of these steps—objective, audience, content—informs the next, making sure your technical setup is there to support a message that matters.
# Creating a Physical Command Center with MuteDeck
When you’re live, the last thing you want is to hunt for the mute button on-screen. Fumbling with your mouse looks clumsy and breaks your rhythm. This is where a physical command center comes in, letting you manage the tech without touching your mouse.
MuteDeck bridges the gap between your webinar software and physical devices like an Elgato Stream Deck (opens new window) or Loupedeck (opens new window). Instead of clicking through menus, you can map core functions—mute, camera, screen share, record—to dedicated physical buttons.
The real win here is reducing your cognitive load. When you can mute your mic with a single, tactile button press, you free up mental bandwidth to engage with your audience.
Setting this up is simple. In the MuteDeck app, you assign actions to the buttons on your device. For example, map the top-left button to toggle your microphone, the one next to it for your camera, and another to start and stop your recording.
The visual feedback is what makes it bulletproof. MuteDeck keeps your device in sync with your meeting status. If your mic is live, the button glows red. When you're muted, it turns green. This glanceable confirmation eliminates the "Hey, you're on mute" interruptions and gives you total confidence. Your desk just turned into a professional broadcast station, and you're in full control.
# Time for a Full Dress Rehearsal
A live webinar is not the place to wing it. Your audience can feel it when a presentation seems clunky, a speaker seems lost, or the tech starts acting up. A full, start-to-finish dress rehearsal is your best defense against the chaos of live events.
You wouldn't step on stage for an opening night without practicing, and the same rule applies here. The goal is to build muscle memory for every part of the event: slide transitions, video playback, presenter handoffs, and launching polls or Q&A sessions.
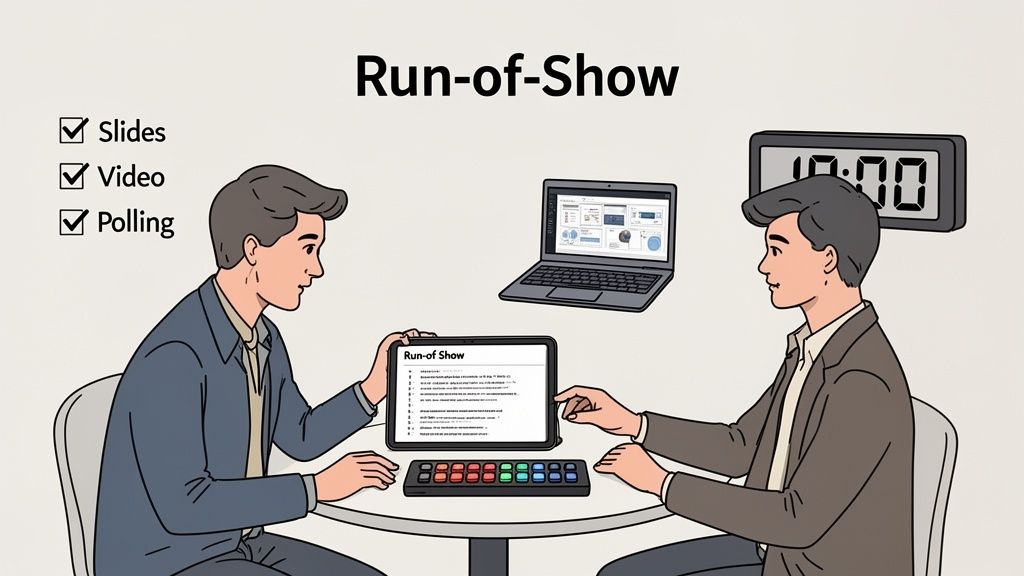
# Build Your Run-of-Show Document
Think of your run-of-show as the minute-by-minute script for the whole event. It’s a detailed timeline that keeps everyone—presenters, moderators, and the tech crew—on the exact same page. This should be a shared document that everyone involved can pull up instantly.
It doesn’t need to be fancy, but it has to be precise. The document should outline every segment with a specific time stamp.
Here’s what to include:
- Timestamp: The exact time each segment begins (e.g., 00:00 - 00:05).
- Segment Title: What’s happening? (e.g., "Welcome & Housekeeping").
- Speaker: Who’s talking or leading this part?
- Visuals/Actions: What should be on screen? (e.g., "Slide 1: Title Slide" or "Launch Poll #1").
- Notes: Any specific cues, like "Remind attendees to use the Q&A box."
A simple run-of-show makes complex handoffs feel effortless. For example, if you're switching from your slides to a co-presenter's screen share, the doc should note the exact moment this happens and who’s driving the transition. This simple step kills awkward, silent pauses.
# Run a Realistic Dry Run
Your rehearsal needs to mimic the live event as closely as possible. Get every presenter and moderator onto the actual webinar platform you plan to use. Go through the entire run-of-show, from the pre-webinar waiting room music to the final "thank you" slide.
During this dry run, obsess over the small details that usually cause big problems. Can everyone hear the audio from that video you embedded? Do your slide animations look right to the audience? Does the link in your call-to-action button work?
This is also the time to practice under pressure. Have someone on the team play the part of a disruptive attendee in the chat and see how your moderator handles it. Intentionally unplug a piece of gear to test your backup plan. Finding a problem during rehearsal is a win, not a failure.
This is where a physical control setup with MuteDeck (opens new window) really shows its value. During the rehearsal, practice using your Stream Deck (opens new window) or Loupedeck (opens new window) to manage your controls.
- When a co-presenter takes over, press your physical mute button. The indicator light on your device confirms you're muted, so you don't have to second-guess.
- Need to step away during a break? Tap a button to kill your camera instantly without digging through menus.
- Practice starting and stopping a recording with a single key press.
This isn't just about convenience. It’s about offloading the mental work of managing the software so you can focus on your delivery and your audience. Rehearsing with these tools builds a tactile, automatic response that makes your live performance look completely effortless and professional. By the time you go live, the controls will feel like second nature.
# Engaging Your Audience in Real Time
A webinar should feel like a conversation, not a lecture. The biggest mistake hosts make is treating it like a one-way broadcast. When you do that, you're competing for attention with email, Slack, and a dozen other browser tabs.
Real-time engagement is your only defense against the inevitable scroll.
The first five minutes set the entire tone. Don't waste them on a long intro. Open with a strong hook—a surprising statistic, a relatable story, or a direct question to the audience. Get them interacting immediately.
Ask a simple question in the chat, like, "Where are you all tuning in from today?" This tiny action proves they aren't just shouting into the void, and it gets them comfortable using the chat feature right away.
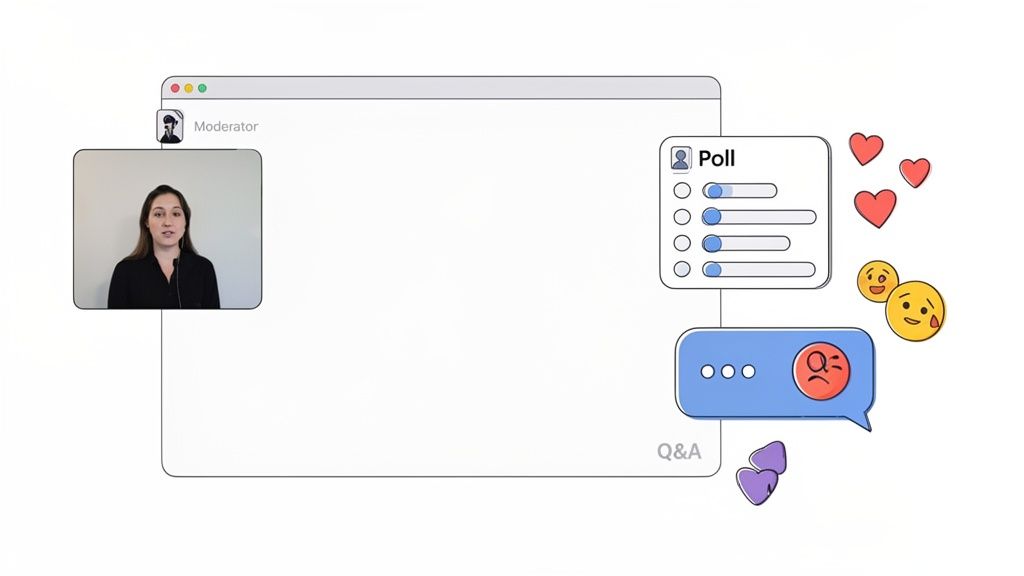
# Weave in Interactive Moments
Passive listening leads to zoned-out attendees. You have to break that monotony by strategically dropping interactive elements throughout your presentation. Think of them as checkpoints to pull your audience back in.
And please, don't save all your interaction for a Q&A at the very end. By then, you may have already lost half the room. A good rule of thumb is to plan a stop to engage every 10-15 minutes.
Here are some practical ways to do this:
- Launch a Quick Poll: Ask a simple multiple-choice question tied to your content. Something like, "What's the biggest challenge you face with [your topic]?" Sharing the results live can spark conversation and makes everyone feel like part of a group.
- Ask for a Show of Hands: Nearly every webinar platform has a "raise hand" feature. It's good for quick yes/no questions to gauge understanding or agreement.
- Pose a Direct Question: Just stop and ask, "In the chat, tell me one thing you've learned so far that surprised you." This encourages active listening and gives you instant feedback.
- Use Breakout Rooms: For smaller, collaborative sessions, breakout rooms are very powerful. Even a short 5-minute session can re-energize the group. If you're using Zoom, we have a good primer on how to use breakout rooms effectively (opens new window).
These moments force the audience to become active participants. They have to do something, which resets their attention span.
# Master the Q&A Session
For your audience, the Q&A is often the most valuable part of the whole event. It's their chance to get direct answers to their specific problems. A poorly managed Q&A can end an otherwise great webinar on a sour, awkward note.
First, have a dedicated moderator. It's nearly impossible for one person to deliver content, monitor the chat, and field questions effectively. The moderator's job is to filter, group, and prioritize questions so the presenter can focus on answering.
Second, prepare for the obvious questions. You probably already know what people are going to ask. Have some pre-written answers ready to paste into the chat for simple, factual stuff. This frees up the presenter to tackle the more complex, strategic questions live.
The real challenge during a live Q&A isn't just answering questions—it's managing the technology while you do it. Multitasking between speaking, reading the chat, and managing your controls is a recipe for awkward pauses and missed cues.
This is where having a physical command center like MuteDeck (opens new window) makes a world of difference. Imagine a participant asks a tough question that requires you to look something up. Instead of fumbling with your mouse to find the mute button, you can just tap a pedal on your Stream Deck to go silent, find your info, and unmute just as easily to continue the conversation.
This hands-free control creates a more fluid and professional experience. You can switch between speaking and typing in the chat without the audience noticing the gear-shifting behind the scenes, keeping you focused on the conversation, not the controls.
# Maximizing Impact After the Webinar Ends
The moment your live broadcast ends isn't the finish line. In many ways, it's just the start. The real business results from a webinar are driven by what you do in the hours and days that follow.
This all starts with a smart, segmented email follow-up. Sending the same generic message to everyone who signed up is a wasted opportunity. You have to speak to attendees and no-shows differently because they had completely different experiences.
# A Smart Follow-Up Email Strategy
Your first email should hit the inbox of everyone who registered within 24 hours. Keep it simple: a thank you for their interest and a link to the on-demand recording. For those who attended, it's a handy resource. For those who missed out, it's their chance to catch up.
The second email, sent about a day later, is exclusively for those who actually attended. This is where you focus on conversion. Reference a specific, valuable moment from the webinar and tie it directly to your call-to-action (CTA). Something like, "Remember when we discussed [specific pain point]? You can see exactly how our tool solves that by booking a quick demo here." This context makes the ask feel relevant, not random.
Finally, a few days later, send a re-engagement email to the no-shows. Acknowledge they were busy and provide the recording link again. It helps to include a brief summary of the top three takeaways to pique their interest and entice them to watch. Your goal here is to recover some of that initial enthusiasm.
# Measuring What Actually Matters
Success isn't just about how many people showed up. Raw attendance numbers are a vanity metric. To understand your webinar's performance and make the next one better, you need to dig into the engagement and conversion data.
These are the metrics that tell the real story:
- Audience Engagement Score: Most platforms provide a score based on how long people stayed, if they asked questions, and whether they responded to polls. A high score means your content landed.
- Poll Responses and Q&A: What did people ask? Which poll options were most popular? This data is a goldmine for understanding your audience's priorities and pain points.
- CTA Conversion Rate: This is the big one. How many attendees actually clicked your call-to-action link? This number tells you if your offer and your message were on point.
When done right, webinars pack a serious conversion punch. On average, 73% of B2B marketers say webinars are their best source for high-quality leads. It makes sense, given that webinars focused on topics like marketing and training see conversion rates between 39% and 45%. These figures show that a well-executed webinar, followed by a smart CTA, is an engine for generating real business.
# Repurpose Your Content to Extend Its Value
Your one-hour webinar isn't a single piece of content. It's a goldmine of smaller assets waiting to be created. Repurposing extends the life of your hard work and reaches people who would never sit through the full recording.
Think of your webinar as a content pillar. From it, you can spin off dozens of smaller pieces. To get the most out of it, you'll want to master some potent content repurposing strategies (opens new window) for different platforms.
The smartest marketers don't create net-new content every day. They get maximum mileage out of a few high-effort pieces. Your webinar recording is one of those pieces.
Start by getting a transcript of your webinar. This makes it easy to pull out key quotes, data points, and concepts. From there, the possibilities are endless:
- Create Short Video Clips: Cut out 1-2 minute segments that highlight a key tip, an interesting statistic, or a powerful answer from the Q&A. These are perfect for sharing on LinkedIn or Twitter.
- Write a Blog Post: Use the transcript to write a blog post summarizing the webinar's main points. You can then embed the full recording right in the post.
- Design an Infographic: Pull out the most compelling stats or a step-by-step process you covered and turn it into a visually appealing infographic.
- Turn Slides into a Carousel Post: Take your most impactful slides and share them as a carousel on LinkedIn or Instagram, adding context in the caption for each one.
- Build a Follow-Up Nurture Sequence: Use key concepts from the webinar to create a series of educational emails for new leads.
By breaking your content down like this, you serve different audiences on different platforms, ensuring your message reaches far beyond the live event. For more ideas on this, check out our guide on how to properly record a webinar (opens new window) with repurposing in mind from the very beginning.
# A Few Common Webinar Questions
Even seasoned presenters have questions. When you're just learning the ropes of running a webinar, a few things always seem to pop up. Here are the big ones I hear all the time, along with some practical answers to keep you on track.
# What’s the Ideal Length for a Webinar?
This is a classic, but the data is pretty clear: 60-minute webinars tend to pull in more sign-ups than shorter 30-minute ones. People seem to block out an hour for learning. The average viewing time hovers around 51 minutes, which tells you that if your content is good, your audience will stick around.
A good rule of thumb is to plan for 45-50 minutes of your core presentation. That leaves a solid 10-15 minutes for a live Q&A session at the end. Whatever you do, don't skip the Q&A—it’s often where the real magic happens and your audience gets the most value.
# How Far in Advance Should I Start Promoting?
Give yourself at least two weeks before the event. That’s the sweet spot for building momentum without people completely forgetting they signed up. You'll see a big chunk of registrations come in during the week before, with another last-minute surge on the day of the webinar.
Don't just rely on one channel. Spread the word.
- Email Marketing: Send an announcement, a "last chance" email a week later, and then the critical reminders 24 hours and 1 hour before you go live. That one-hour reminder is your secret weapon for boosting live attendance.
- Social Media: Get the word out on platforms like LinkedIn or wherever your audience hangs out.
- Partner Promotions: If you have a co-host or guest speaker, make sure they're sharing it with their network. It's an easy way to double your reach.
# What’s the Most Common Mistake People Make?
Hands down, the single most damaging mistake is inadequate preparation. It’s the root cause of almost every webinar meltdown, whether it's a technical glitch or a fumbled presentation.
This isn’t just about knowing your slides. It means running a full, realistic tech rehearsal with every single speaker and moderator. It means testing every microphone, every camera, and every screen-sharing permission. It also means having a minute-by-minute run-of-show document that keeps everyone on the same page when you're live.
Another classic error is talking at your audience instead of with them. A webinar is a two-way street, not a monologue. If you forget to build in interactive moments like polls or you ignore the chat, you turn an engaging event into a boring lecture. You’ll lose people’s attention in a heartbeat.
This is where having the right tools can be a lifesaver. Offloading the mental stress of managing the tech lets you focus on your delivery. Using a physical controller with MuteDeck, for instance, means you can mute your mic or toggle your camera with a single button press. It frees you up to focus on what actually matters: your content and your audience.
Stop fumbling for buttons and start running meetings like a pro. MuteDeck gives you universal, physical controls for every platform, so you can focus on your audience, not your software. Get your free 7-day trial at https://mutedeck.com (opens new window).