# A Guide to Flawlessly Recording a Webinar
Recording your webinar is about way more than just hitting a button. It’s how you multiply the value of your content long after you go off-air. A single recording can transform a one-time presentation into an asset that generates leads, educates customers, and builds your authority on autopilot.
Think of it as squeezing every last drop of value out of a single hour of work.
# Why Your Webinar Recording Is a Strategic Asset
A great webinar recording isn't just a replay for people who couldn't make it. It's the raw material for a content machine that keeps working for your business, day in and day out. In a world of packed schedules, on-demand content is king.
This is a huge shift in how people consume content, and you can't ignore it. The reality is, a big chunk of your audience will probably watch your stuff later. The numbers back this up: a whopping 63% of all webinar views come from replays, not the live event. That stat alone proves that skipping the recording means you're missing most of your potential audience. You can dig into more of these trends over on gudsho.com (opens new window).
# From One-Hour Event to a Content Factory
Let's imagine a real-world scenario. You host a solid one-hour webinar on "Advanced SEO Tactics." With that recording in hand, you can chop it up into a ton of smaller, bite-sized pieces of content. This isn't just about saving time; it's about getting a massive return on your effort.
Here’s how that one recording can fuel your marketing for weeks:
- Ten short social media clips: Pull out the best quotes, like a 30-second tip on "how to find low-competition keywords." These make killer video snippets for LinkedIn, Instagram, or TikTok.
- Three blog post sections: Get the webinar transcribed and use the section on "Link Building Strategies" as the foundation for a detailed blog post that expands on the topics you covered.
- Two newsletter snippets: Grab a compelling takeaway, such as a surprising stat about local SEO, and drop it into your next email campaign to pull people back to the full recording.
A single webinar recording isn’t the final product; it's the raw material for an entire content marketing campaign. When you start treating it that way, you can spread your message far wider and meet your audience where they already are.
# The Long-Term Business Outcomes
When you get serious about recording your webinars, the benefits go way beyond just dicing up content. It plugs directly into your core business goals and creates a system that helps you grow.
This simple habit helps you:
- Generate Leads on Autopilot: Put the full recording on your website behind a simple contact form with a title like "Get the Free SEO Masterclass Recording." Boom. Your expert content is now a lead magnet that works for you 24/7.
- Build Lasting Brand Authority: A library of on-demand webinars on topics like keyword research, technical SEO, and content strategy positions you as the go-to expert in your industry. People will come back again and again.
- Create an Evergreen Content Engine: A recording on a timeless topic like "The Fundamentals of Google Analytics" can keep pulling in views and leads for months—or even years—with zero extra work.
# Your Pre-Flight Checklist for a Perfect Recording
A great webinar recording is almost always decided before you hit the "start recording" button. Just like a pilot runs through a pre-flight checklist, you need a quick, systematic way to make sure everything is ready to go.
This isn't about being fussy; it’s about eliminating last-minute panic and setting the stage for a polished, professional final product. The effort you put in here pays off big time later.
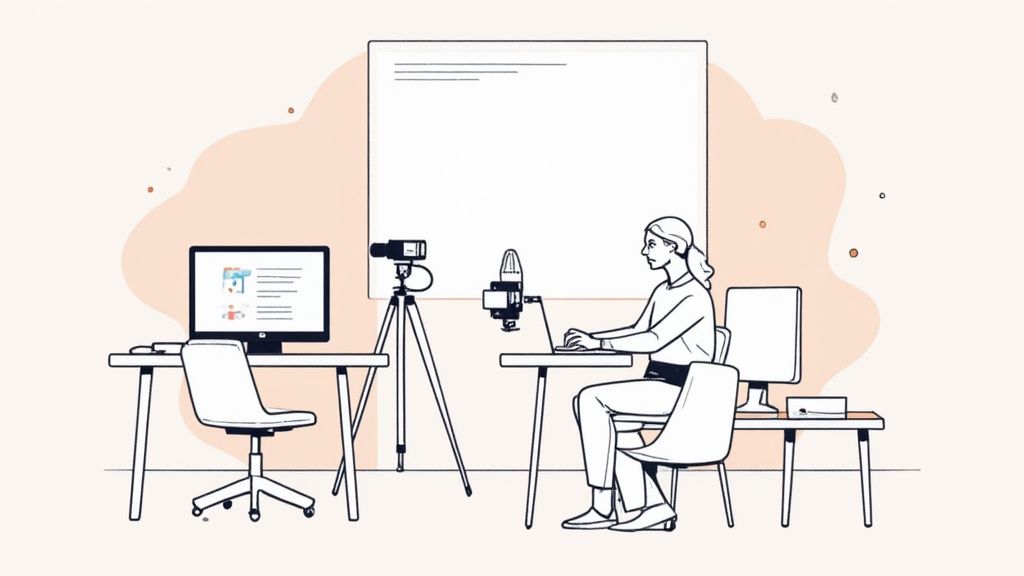
# Nail Your Tech and Environment
Your tech and your physical space are the two biggest things that can derail an otherwise solid presentation. Getting them right isn't optional. Never assume everything will work just because it did last time. Test, test, and test again.
First up, your internet. Wi-Fi is fine for browsing, but it's a liability for live video. A wired ethernet connection gives you a stable, consistent signal, which drastically cuts the risk of your video freezing or dropping out mid-sentence.
- Practical Tip: Buy a long ethernet cable so you aren't tethered right next to your router. This simple purchase offers huge peace of mind.
Next, run through your setup:
- Microphone Check: Open your webinar software's audio settings and speak normally. Watch the little input meter—you want it bouncing consistently in the green, maybe occasionally touching yellow. If it hits red, you’re "clipping," and your audio will sound distorted and harsh.
- Camera Check: Get your camera to eye level. Seriously. Nobody likes looking up your nose. A simple stack of books or a laptop stand can fix this in seconds and makes a huge difference in how you connect with the audience.
- Lighting: You don’t need a fancy studio. You can create a decent three-point lighting setup with lamps you already own. Put one light on each side of your monitor and, if you can, a third, softer light behind you to help separate you from the background.
This whole process is the first step toward creating a valuable asset. A well-prepared recording isn't just a one-off event; it's the raw material for lead generation.
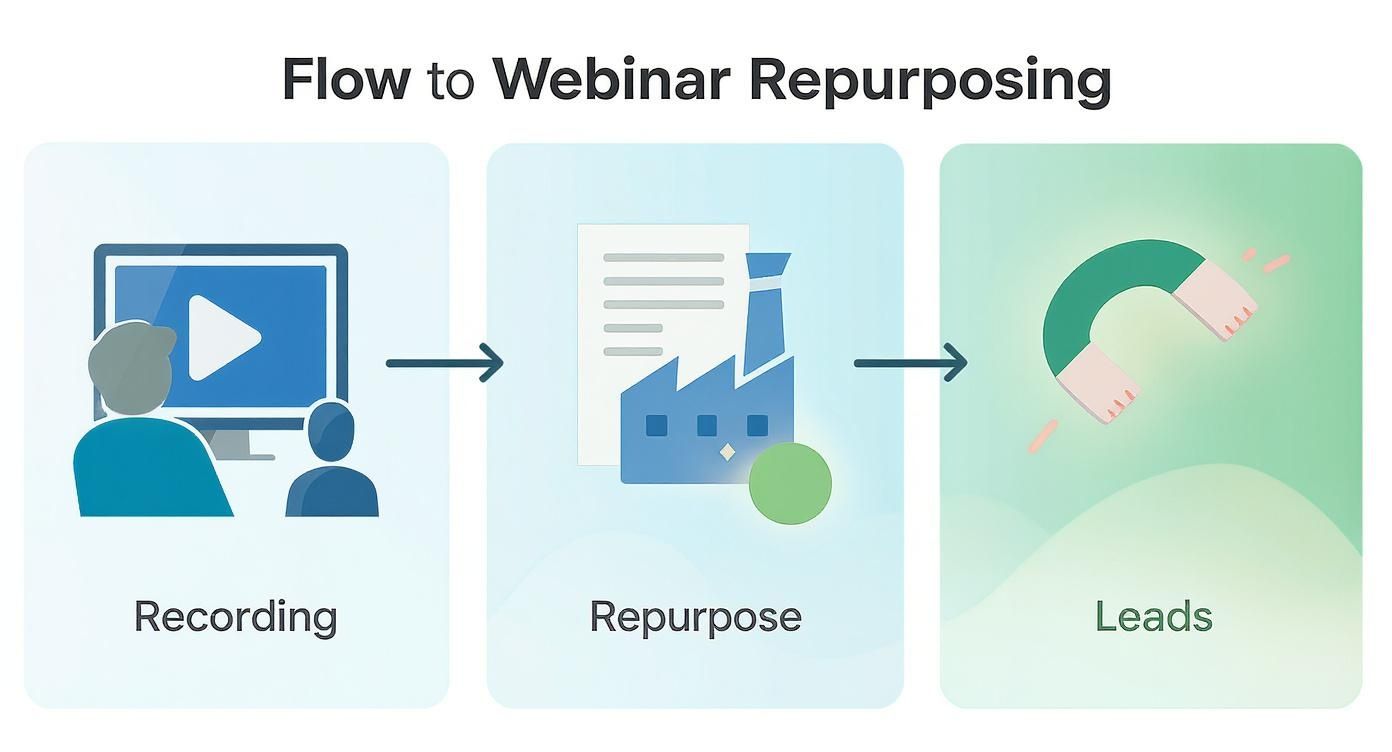
The real magic happens when you repurpose that high-quality recording to attract new leads long after the live event is over.
# Prepare Your Content and Your People
With your tech dialed in, it’s time to think about the actual presentation and anyone else involved. A smooth delivery isn't an accident—it’s the result of practice. This is especially true if you’re co-hosting a webinar with multiple speakers.
A simple but powerful trick is to script your intro and outro. Knowing exactly how you'll start builds confidence, and having a clear ending stops the session from just fizzling out. You don’t need to write out the whole thing word-for-word, but having those bookends makes everything feel more structured and professional.
- Practical Tip: Write your introduction on a sticky note and place it right next to your webcam. This ensures you hit all your key points without looking like you're reading.
A full dress rehearsal is the single best thing you can do for a smooth recording. Run through the entire presentation with your co-presenters. Practice the screen sharing, the handoffs between speakers, and even the Q&A. This is your chance to fix awkward transitions and technical glitches before you have an audience.
# The Final Polish Before You Go Live
Almost there. These last few checks are all about creating a distraction-free zone for you and your audience. Unexpected interruptions are a classic recording-killer, but most are totally avoidable.
Take care of these final items:
- Close Unnecessary Applications: Quit every app and browser tab you don't absolutely need for the presentation. This frees up your computer's resources and, more importantly, prevents a stray Slack notification from popping up while you're screen sharing.
- Silence Your Phone: Put your phone on silent and move it out of arm's reach. The temptation to glance at it is real.
- Manage Background Noise: What happens if a dog starts barking or an ambulance goes by? A noise-cancellation app like Krisp.ai (opens new window) can be a lifesaver. It uses AI to filter out background sounds in real time, keeping your audio clean no matter what's happening around you.
By running through this checklist, you’re no longer just hoping for a good outcome—you’re engineering one. You’ve controlled the variables, practiced your delivery, and built a buffer for the unexpected. Now you're ready to create a webinar recording that truly makes an impact.
# Choosing Your Webinar Recording Software
When it comes to actually hitting the record button, you’ve got a fundamental choice to make. You can either lean on the built-in cloud recording feature of your webinar platform or take full control by capturing it locally with dedicated software.
This isn't just a technical detail—it directly impacts the quality of your final video and how much you can do with it later. Each path has its perks, and the right one really depends on what you want to achieve with the recording.
# The Simplicity of Cloud Recording
Most platforms you're already using—like Zoom (opens new window), Google Meet (opens new window), and Microsoft Teams (opens new window)—have a simple, one-click cloud recording option. You start your webinar, hit 'Record,' and the platform handles the rest. It captures the video, audio, and screen share, then processes and saves the file right to your account.
This "set it and forget it" approach is incredibly convenient. You don't need extra software or any deep technical know-how.
- Perfect for Beginners: If you're new to hosting, this removes a huge technical hurdle.
- Light on Your Computer: The recording is processed on the platform's servers, so it doesn’t slow your computer down.
- Ready to Share Instantly: You usually get a shareable link almost immediately after the webinar ends, which is great for quick follow-ups.
This method is ideal for internal team meetings, quick training sessions, or any time you just need a record of the event for folks who couldn't make it. The focus here is pure convenience, not creative control.
# Taking Control with Local Recording Software
For webinars that are a core part of your marketing, you’ll want more control than cloud recording can give you. That's where local recording software comes into play. Tools like OBS Studio (opens new window), ScreenFlow (opens new window) (for Mac), or Camtasia (opens new window) let you capture everything happening on your screen directly to your computer's hard drive.
This approach gives you maximum power over the final product. You're not just getting a single video file; you're capturing high-quality raw material that's ready for professional editing.
Local recording is the difference between a simple replay and a polished video asset. By capturing high-resolution video and separate audio tracks, you give yourself the raw ingredients needed to create professional, repurposed content that can fuel your marketing for weeks.
For instance, imagine you're recording a webinar with a guest. Capturing your mic and their audio on separate tracks is a game-changer. If your guest's audio has some background noise, you can clean it up in post-production without messing up your own audio. That level of control is flat-out impossible with a standard cloud recording that smashes all the audio into one track.
Modern tools are making this even easier. Find out how MuteDeck is integrating with platforms like Riverside to streamline this process in our guide to MuteDeck's integration features (opens new window).
Here’s a quick look at the interface for OBS Studio, a popular and powerful free option for local recording.
The screenshot shows how you can build different "scenes" and mix various "sources"—like your webcam, screen share, and microphone—into one cohesive recording.
# Cloud vs. Local Recording: Which Is Right for You?
So, how do you choose? It really boils down to a trade-off: convenience versus control. To help you decide, let's put them side-by-side based on what matters most for a webinar recording.
| Feature | Cloud Recording (e.g., Zoom, Teams) | Local Recording (e.g., OBS, ScreenFlow) |
|---|---|---|
| Ease of Use | Excellent; often a single click to start and stop. | Moderate; requires setup and a learning curve. |
| Video Quality | Good; often compressed to save space and processing time. | Excellent; you control resolution, bitrate, and frame rate. |
| Audio Control | Limited; audio sources are usually mixed into one track. | Maximum; can record microphones on separate tracks for editing. |
| Repurposing | Difficult; editing a single compressed file is limiting. | Ideal; separate tracks and high quality make editing easy. |
| Best For | Internal meetings, quick updates, simple archival. | Marketing webinars, product demos, polished on-demand content. |
Ultimately, your strategy should dictate your tools. If you're hosting a quick team sync-up, the simplicity of cloud recording is perfect. But if you're producing a flagship webinar that you plan to slice into social media clips, use in blog posts, and host as a lead-generating asset, the superior quality and flexibility of a local recording are non-negotiable.
# Mastering Audio and Video for a Professional Feel
Nothing tanks your credibility faster than bad audio or video. Your content could be groundbreaking, but if the production quality is distracting, you'll come across as an amateur. The good news? You don’t need a Hollywood budget to go from a fuzzy laptop call to a crisp, professional broadcast.
The single best investment you can make is an external USB microphone. Seriously. Your laptop’s built-in mic is designed for convenience, not quality—which is why it always sounds distant, tinny, and full of echo. A dedicated microphone brings your voice front and center, making it rich and clear.
# Elevating Your Audio Quality
Your audience might forgive grainy video, but they will click away in a heartbeat if the audio is painful to listen to. Clear sound is completely non-negotiable for a webinar people will actually stick around for.
Start with a solid USB mic. For beginners, the Blue Yeti is a classic for a reason—it’s plug-and-play simple and performs reliably. If you're ready for a step up in clarity, the Audio-Technica AT2020 is another fantastic choice that captures a more professional, studio-quality sound.
Once you have your mic, it’s all about technique.
- Maintain Consistent Distance: Try to stay about 6 to 12 inches from the microphone as you speak. This one simple habit keeps your volume from jumping all over the place, which is a huge distraction for listeners.
- Use a Pop Filter: This cheap little screen clamps onto your mic and softens those harsh "p" and "b" sounds (plosives) that create an unpleasant popping noise in the recording.
- Minimize Background Noise: A huge part of sounding professional is only sounding like you. Take a few minutes to learn how to remove background noise for clear audio (opens new window) to ensure your message is the only thing your audience hears.
For a deeper dive, check out our updated guide to the best microphones you can buy in 2024 (opens new window).
# Refining Your Video Presence
With your audio sorted, you can turn your attention to the visuals. Good video makes you appear more engaging and professional, helping you build a stronger connection with your audience. And just like with audio, a few simple tweaks can make a massive difference.
Camera placement is your first priority. The lens should always be at eye level. Stacking some books under your laptop or using a dedicated stand is a zero-cost way to instantly improve your angle and create a more direct, engaging line of sight. It’s a tiny change with a huge psychological impact.
Next up, lighting.
You don't need expensive studio lights to look good. The best and cheapest light source is probably sitting right outside. Position your desk so you are facing a window, letting that soft, natural light illuminate your face evenly.
If natural light isn't an option, a simple ring light or even a desk lamp placed behind your camera can work wonders. The goal is to light your face from the front—not from above or behind, which creates unflattering shadows.
- Practical Tip: Turn off any overhead lights in your room, as they can cast harsh shadows under your eyes. Rely on front-facing light sources instead.
Finally, don't sleep on the camera you already own. Most modern smartphones have cameras that are miles ahead of built-in webcams. Apps like Camo or Reincubate can turn your phone into a high-quality webcam for your computer.
# Streamlining Your Workflow with Hardware Controls
Once your audio and video are dialed in, the final layer of professionalism is a smooth, seamless delivery. Fumbling to find the mute button or awkwardly switching between screens breaks the flow and makes you look unprepared. This is where hardware controllers absolutely shine.
Tools like the Elgato Stream Deck or a Loupedeck console are physical devices with customizable buttons that give you tactile control over your webinar. Instead of clicking around a chaotic interface, you can run your entire production with single button presses.
Picture this: you're presenting, and a participant asks a great question. With a Stream Deck, you could:
- Press one button to switch from your slides to your full-screen camera, creating a more personal connection for the answer.
- Press another to play a pre-recorded video demo without ever fumbling with screen sharing options.
- Instantly mute your mic with a physical key if you need to cough or the dog starts barking.
This level of control transforms your webinar from a basic screen share into a dynamic production. It lets you stay focused on your content and your audience—not the software—which makes for a far more polished and engaging experience for everyone.
# Your Post-Production and Distribution Game Plan
The live webinar is done. High five! But your work isn't over just yet. That raw recording is pure gold, but it needs a little polish before it's ready to keep working for you. This is where you transform that footage into a professional, shareable asset.
And don't worry, you don't need to be a video editing wizard. Modern tools have made this part surprisingly simple.
# Simple Edits for a Polished Final Cut
First things first: a quick cleanup. I'm a big fan of tools like Descript (opens new window), which lets you edit your video just by editing the text transcript. It's a game-changer.
Focus on a few high-impact tweaks that make all the difference. Start by trimming the awkward silence and "is everyone here?" chatter from the beginning and end. People watching the replay want to jump right into the good stuff. Next, use the software's magic to automatically hunt down and zap filler words like "um," "ah," and "you know."
- Practical Tip: When trimming the start, don't cut immediately to the first word. Leave a 1-2 second pause with your title card to give viewers a moment to orient themselves.
Finally, add some simple branding elements:
- An Intro Card: A brief title card with your logo and the webinar title.
- An Outro Card: A concluding slide with a clear call-to-action (e.g., "Visit our website for a free trial") and a link back to your site.
These small touches take a raw recording and make it feel like a deliberate, valuable piece of content. For a few more tips, check out our guide on getting the most out of your Zoom cloud recording (opens new window).
# Accessibility and Consent Before You Share
Before you hit publish, there are two crucial steps you absolutely cannot skip: captions and consent. Adding accurate captions makes your content accessible to a wider audience, including those who are deaf or hard-of-hearing, and the many people who watch videos with the sound off.
Always get explicit consent from any presenters, panelists, or participants who are identifiable in the recording before you share it publicly. A simple email confirmation is usually sufficient, but it’s a non-negotiable step for respecting privacy and avoiding legal trouble.
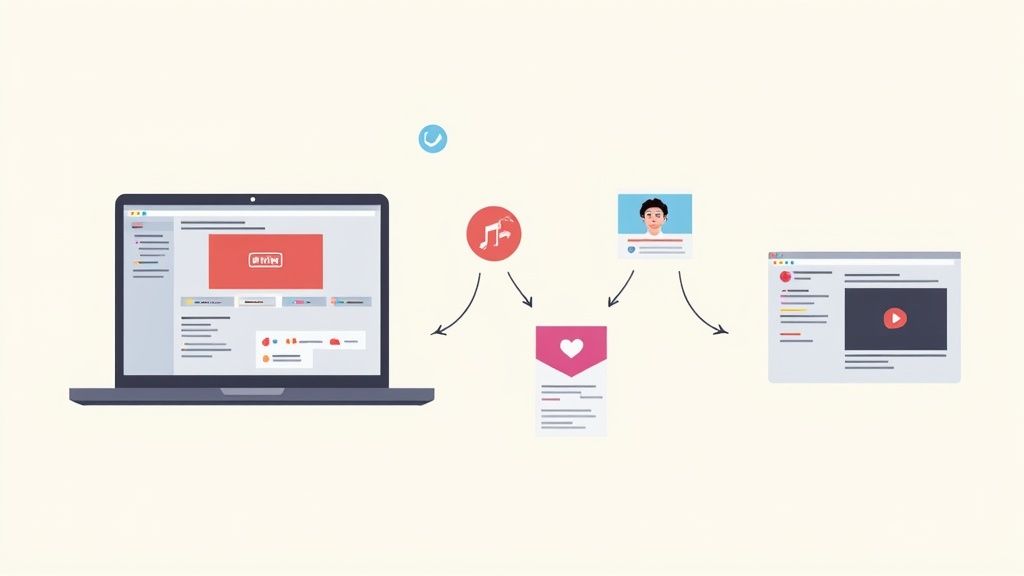
# Crafting a Smart Distribution Strategy
With a polished and accessible video in hand, it's time to get it in front of people. A multi-channel strategy ensures you squeeze every last drop of value out of your hard work. Think of the live event as just the beginning.
This is why recording is so vital. Live attendance rates have dipped to an average of 48%. But people love watching on their own time—data shows that replay viewers stay engaged for an average of 24 minutes. Your recording is how you reach everyone else.
Your distribution plan should hit three core channels:
- Email the Replay to Registrants: This is your first move. Send a follow-up email to everyone who signed up—attendees and no-shows alike—with a direct link to the recording.
- Host it on a Landing Page: Create a dedicated page on your website for the on-demand webinar. Gate it with a simple form, and you’ve just created an evergreen lead-generation machine.
- Upload to YouTube: Expose your content to a massive new audience. Upload the full recording, or even just a few compelling clips, and optimize the title and description with keywords to pull in organic search traffic.
To really maximize your reach, this is where you can get creative. Chop up your full webinar into bite-sized clips for social media using a handy long to short video converter (opens new window). By thinking strategically, your recording will continue delivering value long after the live event has wrapped.
# Still Have Questions About Recording a Webinar?
Even with the perfect plan, a few nagging questions always seem to pop up right before you hit record. Let's tackle some of the most common ones I hear from hosts.
Think of this as your quick-hit FAQ for those last-minute "what if" scenarios that separate a decent recording from a truly professional one.
# What’s the Best Format to Save My Webinar Recording In?
For just about every scenario you can imagine, MP4 with the H.264 codec is the answer. It’s the undisputed champion for a reason.
This format gives you that perfect sweet spot: high-quality video that doesn't create a ridiculously large file. That's a huge win for both storing your recordings and uploading them later. More importantly, it’s universally compatible. You won't get frustrating error messages from YouTube (opens new window) or Vimeo (opens new window), and your audience can watch it on any device without a hitch.
- Practical Tip: When exporting from your editing software, look for a preset labeled "YouTube 1080p" or "Web Optimized." These settings almost always use MP4 (H.264) and are perfect for webinars.
Sure, other formats like MOV or AVI exist, but sticking with MP4 just makes your life easier, from editing all the way to distribution.
# Can I Record a Webinar if I’m Just an Attendee?
Honestly, trying to record a webinar as an attendee without getting permission first is a really bad look. You're wandering into a legal and ethical minefield, from privacy laws to the host's copyright. The only right way to do this is to ask the host directly.
Most of the time, presenters are happy to send out the official recording to everyone who registered. If you have a legitimate reason to record it yourself—say, for personal note-taking—you absolutely need to get explicit, written permission beforehand. Firing up a third-party screen recorder without consent is a big no-no.
The professional standard is simple: the host is in control of the recording. As an attendee, your best move is always to ask for the official replay. It respects the creator and keeps you in the clear.
# Should I Record My Webcam and Screen Separately?
If you're creating a high-stakes marketing webinar and want total control in the edit, the answer is a resounding yes. Using software like OBS Studio (opens new window) or Camtasia (opens new window) to capture your screen and webcam as two separate video tracks is a pro-level move that pays off big time.
This technique gives you complete creative freedom in post-production. For example, you can:
- Resize your camera feed: Make yourself bigger when you’re telling a story, then shrink it down during a detailed demo.
- Move your camera: Shift your video to another corner to avoid covering up key text on a slide.
- Hide your webcam: Remove your camera entirely for certain segments to let the on-screen content take center stage.
While most built-in cloud recorders just bake everything into one video file, recording separate tracks is what elevates your final product from a simple recording to a polished, broadcast-quality asset.
# What's the Most Common Mistake People Make When Recording?
The single biggest mistake—and the one that does the most damage—is ignoring audio quality. It's wild how many hosts will spend weeks perfecting their slide deck but then just use the tinny, echo-prone microphone built into their laptop.
Here’s the thing: viewers are incredibly forgiving of mediocre video. A slightly grainy webcam or less-than-perfect lighting is fine. But bad audio? They will leave. Instantly.
- Practical Tip: Before you invest in anything else—a better camera, new lights, fancy software—buy an external USB microphone. A $50-$100 mic will make a bigger impact on your recording quality than any other single purchase.
Muffled, distorted, or hard-to-hear audio is distracting and torpedoes your credibility, no matter how brilliant your content is. It just sounds unprofessional. Investing in a decent external USB microphone is, hands down, the best return on investment for improving your webinar quality. It's the one place you absolutely cannot afford to cut corners.
Take control of your meetings and presentations with MuteDeck. Stop hunting for buttons and manage your mic, camera, screen share, and recording with a single, reliable interface that works across every platform. Learn more and start your free trial at mutedeck.com (opens new window).