# How to Share Screen on PC A Complete Guide
Knowing how to share your screen on a PC has become as fundamental as sending an email. It’s no longer a niche skill for the IT crowd; it’s an everyday tool for anyone working or learning online.
To get started, you just open your meeting app, hit the "Share Screen" or "Present" button, and pick what you want to show—either your entire desktop or a single application window. It's a simple move, but mastering it is key to clear, effective digital collaboration.
# Why Mastering PC Screen Sharing Matters
Let's be honest, screen sharing is the engine of modern remote work. It transforms a fuzzy phone call into a crystal-clear visual experience, letting you show your team exactly what you're talking about instead of just trying to describe it.
When you can show, not just tell, communication clicks into place. It's how we get things done now.
The numbers back this up. The whole remote desktop and screen-sharing software market hit $15 billion in 2025 and is still climbing. In 2024, more than 70% of businesses were using some kind of screen-sharing tool, with giants like Zoom (opens new window) and Microsoft Teams (opens new window) becoming household names. You can dig into the market trends (opens new window) yourself, but the takeaway is clear: this isn't just a feature, it's a core part of how we work.
# More Than Just Meetings
While we mostly think of screen sharing for meetings, it’s a lifesaver in tons of other situations.
- Collaborative Work: Developers can pull up their code to squash a bug together in real-time. Designers can present mockups and get instant feedback instead of waiting on an email chain.
- Dynamic Sales Demos: Why describe your product when you can show it? Sales pros can walk clients through a live demo, making the features feel tangible and interactive. Practical Tip: Open the software and have the specific feature you want to highlight already loaded before you start the call. This avoids awkward loading times.
- Remote IT Support: It's the ultimate fix for tech headaches. IT can see exactly what’s on a user's screen and guide them through a solution without having to be there in person.
- Effective Online Tutoring: Teachers can share slides, a digital whiteboard, or a specific app, creating a learning environment that’s just as engaging as a physical classroom. Practical Tip: A tutor can share a PDF of a math worksheet and use annotation tools to solve a problem step-by-step with the student.
Once you get how valuable this is in the real world, the technical steps that follow make a lot more sense. Every time you share your screen, you have a chance to make a point clearer, move a project forward, or solve a problem that much faster.
# How to Share Your Screen on Major Platforms
Jumping between Zoom, Teams, and Meet can feel like relearning how to drive a car every time you switch apps. The "share screen" button is always there, but its location, options, and little quirks are just different enough to trip you up when you're live in front of an audience.
Let's walk through the exact steps for the tools you use every day. I'll highlight the small details that make a huge difference in keeping your presentations smooth and professional.
This visual guide breaks down the core reasons we share our screens—from quick team huddles to formal presentations or even remote tech support. It's all about showing, not just telling.
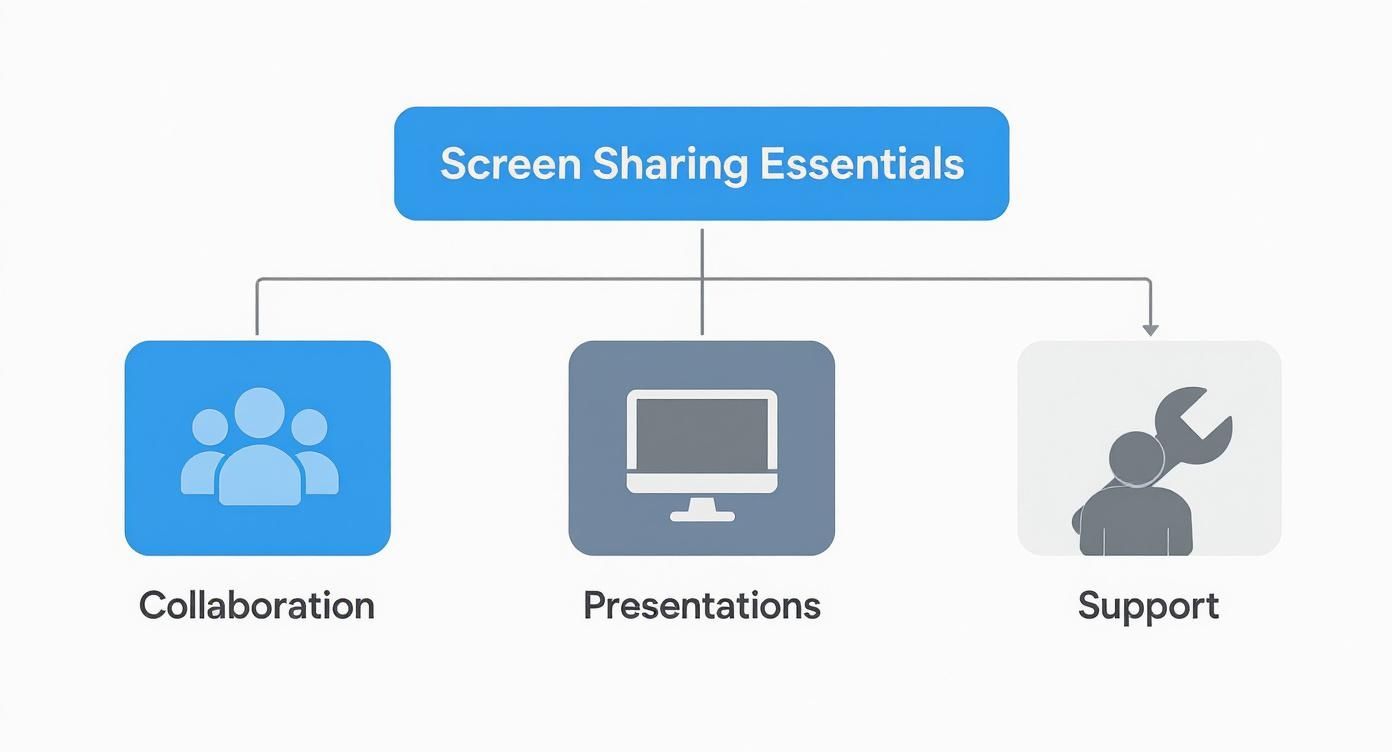
As you can see, the function is the same, but the context is everything.
# Mastering Screen Sharing in Zoom
Zoom is a beast when it comes to virtual meetings, and its screen sharing is packed with features. You'll find the big green "Share Screen" button right in the middle of your meeting controls at the bottom of the window. Click it, and a new panel pops up with all your options.
You can share your entire desktop, but I almost never recommend it. This shows everything—pop-up notifications, messy desktop files, you name it. For a cleaner, more focused presentation, always choose to share a specific application window. Practical Example: If you are presenting a slide deck, choose to share the "PowerPoint" window, not your "Desktop."
A pro tip I give everyone: look at the bottom of that sharing window. You'll see two crucial checkboxes: "Share Sound" and "Optimize for Video Clip." If you're playing a video, a YouTube clip, or anything with audio, checking these is non-negotiable. It’s the difference between a smooth experience and an awkward, silent one.
# How to Share Your Screen in Microsoft Teams
Microsoft Teams (opens new window) bakes screen sharing right into its collaborative workflow. To get started, hit the "Share" icon—it looks like a rectangle with an arrow pointing up—in the top-right corner of your meeting controls. This slides out a panel with your sharing choices.
Teams lets you present your entire screen (Desktop), a single Window, a PowerPoint file, or a collaborative Whiteboard. One thing I love is that the "Include computer sound" toggle is right at the top of the panel, making it hard to miss. Flip that on before you share any media. Practical Tip: Use the dedicated "PowerPoint Live" option when sharing slides. It lets attendees navigate slides at their own pace without interrupting your presentation flow.
# Presenting Your Screen in Google Meet
Google Meet (opens new window) is all about browser-based simplicity, and its sharing function follows that rule. Click the "Present now" button (an arrow inside a box) at the bottom of the screen. You'll get three clear options:
- Your entire screen: Shares every pixel on your monitor. Use this one with caution.
- A window: This is your safest bet for privacy, as it limits the view to just one app.
- A tab: Here’s Meet’s secret weapon. If you're sharing a video or animation from a browser, always use this option. It delivers the smoothest playback with the least amount of lag.
For static documents, sharing a window is fine. But for anything media-rich, sharing a single Chrome tab is the way to go. And if you're looking to share your screen in a different context, like to a TV, you can explore options like Amazon Fire Stick screen mirroring (opens new window).
# Screen Share Feature Comparison Across Platforms
With all the subtle differences, it can be tough to remember which platform does what. Here’s a quick-glance table to help you keep track of the key screen sharing features across the major players.
| Feature | Zoom | Microsoft Teams | Google Meet | Cisco Webex |
|---|---|---|---|---|
| Share Entire Screen | Yes | Yes | Yes | Yes |
| Share App Window | Yes | Yes | Yes | Yes |
| Share Browser Tab | No (shares entire browser window) | No (shares entire browser window) | Yes (Optimized for video/audio) | No (shares entire browser window) |
| Share System Audio | Yes (Checkbox on share) | Yes (Toggle on share) | Yes (With Tab sharing only) | Yes (Checkbox on share) |
| Optimize for Video | Yes (Checkbox on share) | Automatic (when sharing PowerPoint Live) | Automatic (With Tab sharing) | Yes (Dropdown option) |
| Whiteboard | Yes | Yes | Yes (via Jamboard integration) | Yes |
| Share Portion of Screen | Yes (Advanced feature) | No | No | No |
This table makes it clear that while all platforms cover the basics, Google Meet's optimized tab sharing and Zoom's "portion of screen" feature are unique standouts for specific use cases.
# Sharing Your View in Cisco Webex
Cisco Webex (opens new window) has been a staple in the corporate world for years, and its sharing capabilities are rock-solid. Just like the others, you'll look for the "Share" button in your main control bar.
Webex gives you a clean visual preview of all your open windows, which I find really helpful for making sure I click the right one under pressure. It also offers the standard options to "Optimize for motion and video" and a checkbox to share your computer audio, so any multimedia content comes through loud and clear for your audience. Practical Tip: Before sharing, use the preview panel in Webex to quickly confirm you have the correct document or application selected, which helps prevent accidentally sharing the wrong window.
# Pro Tips for Flawless Screen Sharing
Knowing how to click the "Share" button is one thing. Actually delivering a smooth, professional presentation is another game entirely. Once you move past the basics, a few insider tricks can take your meetings from feeling amateur to looking truly authoritative.
Let’s get into the pro-level techniques for managing your digital workspace, keeping your audience hooked, and making sure your multimedia content lands perfectly every time.
# Master Your Multi-Monitor Setup
If you’re running two or more monitors, you have a secret weapon for delivering polished presentations. The idea is simple: you present on one screen while your private notes, attendee chats, and upcoming slides stay visible only to you on the other. It’s the key to a seamless, confident flow.
Here’s how I do it when presenting a PowerPoint slideshow:
- First, head to the Slide Show tab in PowerPoint and click "Set Up Slide Show."
- Under the "Monitors" section, pick the screen you want your audience to see.
- Then, and this is the magic part, check the box for "Use Presenter View."
Now when you start your slideshow, the main presentation goes full-screen on the monitor you chose. Your other screen transforms into your personal command center: you'll see your current slide, what's coming up next, your speaker notes, and even a timer—all completely invisible to everyone else. Trust me, it’s a game-changer for staying on track without shuffling papers.
# Share Only What’s Necessary
Sharing your entire desktop is an open invitation for chaos. A stray notification from Slack, a messy desktop, or a browser tab with your personal banking open can instantly torpedo your credibility. The fix is to share only a single application window or, even better, just a small portion of your screen.
Most platforms let you select a specific window, which should be your go-to move for safety. But some tools, like Zoom (opens new window), have an advanced feature that lets you share just a portion of your screen. This is brilliant for focusing your audience’s attention on one specific chart or a single feature in a complex app, hiding all the other distracting clutter.
This focused approach doesn’t just protect your privacy—it forces your audience to look exactly where you want them to. By cutting out the visual noise, you make your point clearer and more powerful.
# Make Sure Your Audio Is Heard
There's nothing more cringeworthy than playing a video in a meeting only to see the chat fill up with "we can't hear anything." When you share your screen, your computer's audio doesn't tag along for the ride automatically. You have to explicitly tell the meeting software to include it.
Before you hit "Share," look for a little checkbox or toggle that says "Share sound," "Include computer sound," or something similar. Forgetting this is easily the most common screen-sharing mistake. For example, if you're a Google Meet user, remember that system audio works best when you share a single browser tab, which also helps optimize video playback. You can find more tips like this in our guide on how to supercharge Google Meet (opens new window).
These features are more integrated than ever, especially in operating systems like Windows 11. With the massive shift to remote work, it’s no surprise that over 80% of businesses now rely on this tech for daily operations. If you're curious, you can find more stats on how the PC market is influenced by these trends (opens new window).
# Solving Common Screen Sharing Glitches
Even when you've done everything right, technology has a way of throwing a curveball. Knowing how to share your screen is only half the battle; the other half is knowing what to do when things inevitably go wrong. Instead of panicking mid-presentation, a few quick fixes can solve most of the common hiccups.
One of the most jarring issues is the dreaded black screen—you think you're sharing, but your audience just sees a dark void. This almost always points to a conflict with your computer's graphics hardware. The fix is usually buried in your meeting app's settings: find and disable hardware acceleration. Practical Example: In Zoom, go to Settings > Video > Advanced and uncheck "Use hardware acceleration for sending video."
# Resolving Permission and Audio Issues
Another common roadblock is permissions. If you click "Share" and nothing happens, your operating system is likely blocking the app. You'll need to dive into Windows Settings, go to Privacy & security, and find the "Screen capture" or "App permissions" section to give your conferencing tool the green light.
Then there's the classic silent movie problem. You play a video, but your audience can't hear a thing. This is almost always because you forgot to check the "Share system audio" or "Include computer sound" box when you started the share. It's a simple step, but easily the most common reason for silent videos.
For a deeper dive into the specific permissions needed for different scenarios, our guide on how remote access screen sharing (opens new window) works has you covered.
# Reducing Lag and Improving Performance
A laggy or frozen screen share can completely derail a presentation. When your cursor stutters and slides won't advance, it's usually a network or system performance issue. The best defense is a good offense—free up your computer's resources before the call starts.
Before you even join the meeting, close every application and browser tab you don't absolutely need. Each open program eats up RAM and CPU cycles, which can slow everything down and lead to a choppy stream for your audience.
Here are a few other tricks that can make a big difference:
- Go Wired: Ditch the Wi-Fi if you can. Plugging directly into your router with an Ethernet cable gives you a far more stable and faster connection.
- Lower Your Resolution: Temporarily knocking your screen resolution down a notch can dramatically reduce the amount of data you're sending, which often smooths things out.
- Check for Lurkers: Look in your system tray and Task Manager for non-essential apps running in the background and shut them down. Practical Tip: Press
Ctrl+Shift+Escon Windows to open the Task Manager and sort by "CPU" or "Memory" to find and close resource-heavy programs.
Sometimes, the root cause is just a sluggish connection. If you're constantly fighting lag, it might be worth investigating why your internet is slow (opens new window) to see if you can fix the underlying problem.
# Protecting Your Privacy While Screen Sharing
Sharing your screen shouldn't mean sharing your secrets. Every time you hit that share button, you’re not just showing your work—you're potentially exposing notifications, random browser tabs, or confidential files you left open on your desktop. A few good habits can save you from a seriously embarrassing digital slip-up.
Think of it like a pre-flight checklist. Before you even think about sharing, make it a rule to close every single unrelated application and browser tab. This one move stops you from accidentally clicking over to something sensitive and frees up your computer's resources for a much smoother presentation.
# Lock Down Your Digital Workspace
Once you've cleared the clutter, it's time to silence the noise. Pop-up notifications are probably the #1 cause of unprofessional interruptions. We've all seen it happen.
Luckily, your PC has tools built right in to handle this. On Windows, for example, Focus Assist is your best friend. You can flip it on to block all notifications instantly. Even better, you can set rules so it kicks in automatically when you’re in a full-screen app. No more personal messages from a friend popping up during a critical client demo.
The safest way to share is to never share your entire screen. Always, always choose to share a single application window instead. It creates a digital curtain, showing your audience only what they need to see and keeping everything else hidden from view.
# Be Smart About Remote Control
Most meeting tools let you grant someone else remote control of your computer. This is a lifesaver for IT support or collaborative design sessions, but it's a feature that comes with some pretty big security risks. When you hand over control, you’re literally letting someone else drive your machine.
Be thoughtful about who you give the keys to.
- Your company's IT support? Usually safe and often necessary.
- A trusted colleague on a shared project? A great way to work together. Practical Example: A designer can grant remote control to a developer to quickly test a color change directly in the code.
- An external client or a stranger? It's best to politely decline unless it's absolutely critical and you're fully aware of the risks involved.
Security is a massive deal, with 90% of organizations making robust encryption and multi-factor authentication a top priority when choosing platforms. The global focus on data security is constantly shaping how these tools are built and what features they offer. You can see these trends playing out across the screen sharing software market (opens new window).
Bottom line: treat remote control with caution. It’s the best way to keep your digital workspace secure.
# A Few Lingering Questions About Screen Sharing
Even when you know the basics of how to share your screen on a PC, a few common questions always seem to pop up. Let's tackle them head-on so you can share your work without a second thought.
The good news? Most of this stuff is way more straightforward than it sounds.
# Can I Share My Screen Without Installing Any Software?
Yes, you absolutely can. The magic behind this is a technology called WebRTC (Web Real-Time Communication), which is built right into modern browsers like Chrome, Firefox, and Edge.
When you jump into a browser-based tool like Google Meet (opens new window), it uses WebRTC to capture and send your screen content directly to the other participants. It completely bypasses the need for a dedicated desktop app, which is perfect for quick, one-off meetings or when you’re collaborating with someone outside your organization.
# How Can I Make My Screen Share Look Less... Blurry?
We've all been there: you're trying to show a cool video or animation, and the stream turns into a pixelated, choppy mess. It’s frustrating for everyone.
The single best fix, especially for video, is to share a single browser tab instead of your entire screen.
Meeting platforms are heavily optimized for this. When you share just one tab, the app sends the original video and audio stream directly, which results in buttery-smooth playback. A few other quick fixes can also make a huge difference:
- Shut down background apps. Anything you're not using is just eating up precious memory and processing power.
- Go wired. If you can, plug in an Ethernet cable. It’s almost always more stable than Wi-Fi.
- Drop your resolution. Temporarily knocking your display down from 4K to 1080p can significantly reduce lag and improve clarity for your audience. Practical Tip: On Windows, right-click your desktop, go to "Display settings," and choose a lower resolution like 1920x1080 from the dropdown menu before your call.
# Screen Sharing vs. Casting vs. Mirroring: What’s the Real Difference?
People throw these terms around all the time, but they actually mean very different things. Knowing which is which helps you pick the right tool for the job.
Screen sharing is all about collaboration. It’s a two-way street inside a meeting app, letting you show your screen while still seeing and talking to everyone else. Think presentations, code reviews, and teamwork.
Casting is much simpler. You just "cast" a piece of media—like a YouTube video—from your PC to a smart TV. You're just sending the content over, not your entire interactive desktop.
Mirroring, on the other hand, creates a perfect, real-time copy of your entire PC screen on another display. It’s a one-way broadcast, ideal for showing off photos or walking someone through an app on a bigger screen.
For anyone who lives in meetings and constantly shares their screen, juggling the different controls for each app is a real pain. MuteDeck solves this by giving you one consistent, universal control panel for Zoom, Teams, Google Meet, and more. Stop hunting for the right button and get a tool that just works, every time. Learn more and start your free trial at MuteDeck (opens new window).